It is an ideal beverage if you need a pick-me-up in the afternoon; espresso with chocolate is a march made in heaven. Read on to learn how to make your own.
There was a time when every college student had an espresso with chocolate or a mocha drink in hand, be it a frappuccino or a caffè mocha. I, too, succumbed to this trend as it was the next cool thing after the first-generation iPhone. Funnily enough, the mocha frappe was also the first Starbucks beverage I ever ordered. Simpler times, indeed.
Now that I have expanded my java knowledge, I have come to love the warmer counterpart more as I find it healthier and more flavorful. Caffè mocha is also budget-friendlier compared to when you buy it in a coffee shop.
The ingredients are accessible, and it is easy to make. Let’s dig in. You might also be interested in our guide on how to make mocha iced coffee.
Materials Needed
Equipment:
- Espresso Machine, Aeropress or a French press to make an espresso shot
- An eight oz to 12 oz glass
- Milk steamer
- Hand or stand mixer (optional)
- Microwave or stovetop (optional)
Ingredients:
- One-ounce espresso shot
- Two to three tablespoons of chocolate
- Four to eight ounces of milk
- Whipped cream or heavy cream (optional)
- Flavorings such as syrups (optional)
Step One: Steam Your Milk
This will take time to make, so you should do this first. Go for four or five ounces first once you start steaming it, as this process will increase the volume of the milk by around 50%. If you think this won’t fill your glass, you can always steam the milk or add more.
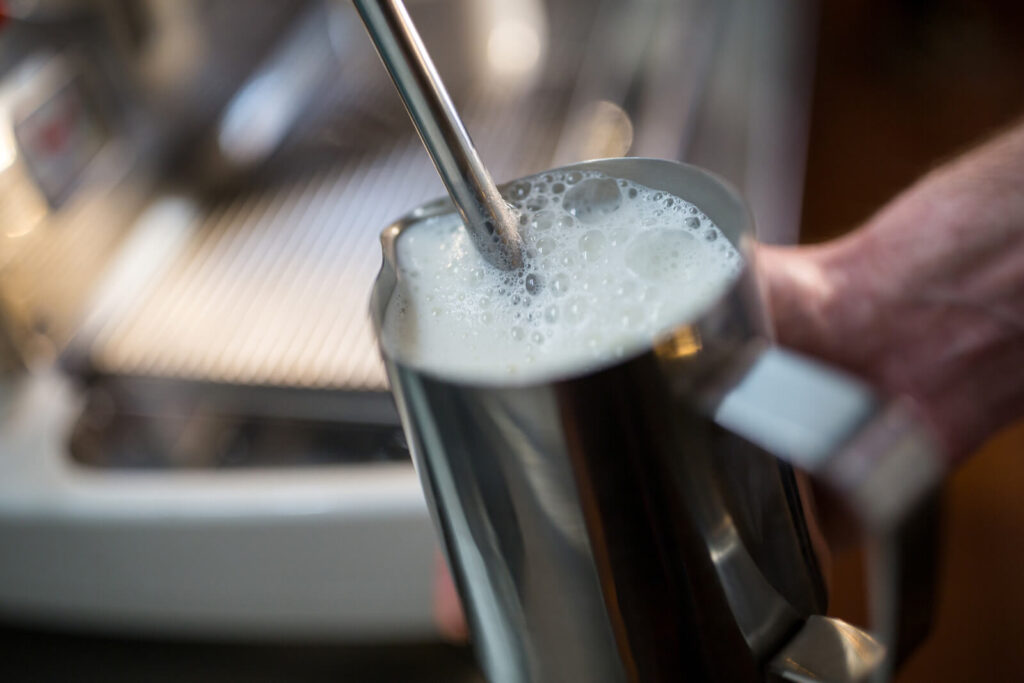
If you don’t have a milk steamer, what you can do is froth your milk first. An easy way would be to put the milk in a jar and shake it. Once it becomes frothy, put the frothed milk in a bowl and microwave it for 20 to 30 seconds.
Set it aside for now.
If you don’t like steamed milk, that’s okay. You can add the milk as is though I would recommend you heat it first (but don’t boil it). As for the cream, if you don’t have whipped cream, you can use the good old whisk and bowl if you have to do it manually.
Step Two: Brew Your Espresso
Put your fine coffee grounds into your espresso machine and let it do the work. Alternatively, check out our guide on how to pull an espresso shot.
Opt for a light or medium roast coffee beans for a brighter flavor. It will also highlight the flavor of the coffee more. If you want your caffè mocha to have a deeper chocolate flavor, you can choose a dark roast.
Step Three: Ready Your Chocolate
You can use cocoa powder for a lighter texture and bring out the flavor of the java. However, I recommend melting your favorite chocolate bar to suit your preference more. You can use a microwave and let it cook for 20 to 30 seconds.
Check the consistency of the chocolate every ten to 15 seconds to avoid burning it and to make sure it melts evenly.
Another piece of advice would be to use milk chocolate as it can give a silky texture and thicker consistency to your caffè mocha due to the cocoa butter. Its sugar content also adds sweetness to the drink. If you are using a dark roast, go for dark chocolate for that soft, extra bitterness.
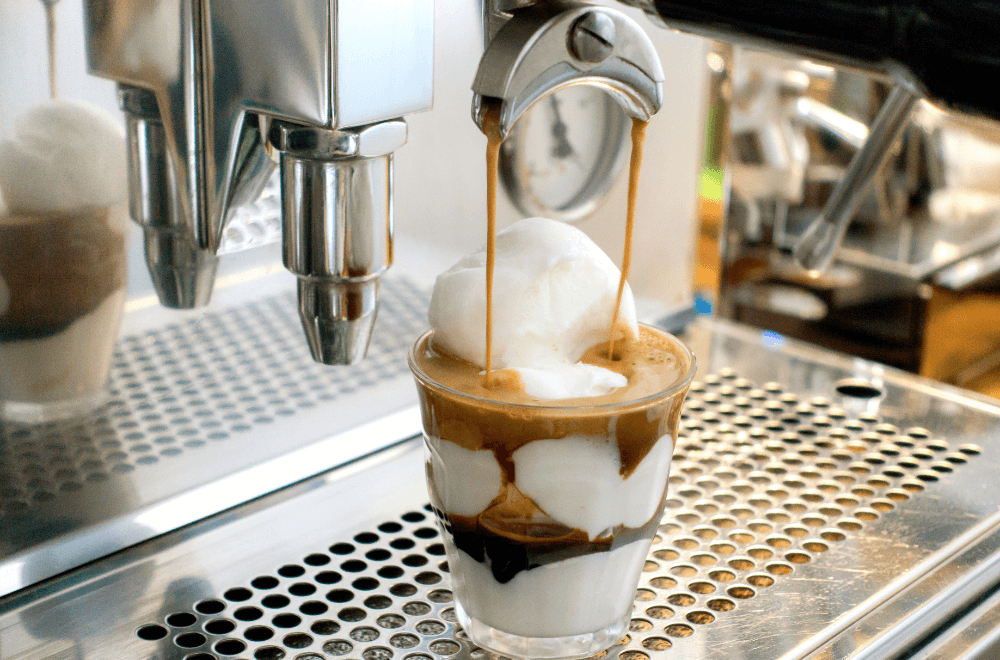
Step Four: Mix The Espresso With Chocolate
Pour these two ingredients into your serving glass. If you are using cocoa powder, make sure to mix it thoroughly so that it melts in your espresso, and add a bit of sugar to taste. You can also use chocolate syrup as an alternative.
If you are using melted chocolate, pour it slowly and mix it simultaneously to allow it to incorporate with the espresso. I usually save a small amount of the melted chocolate and let it run down the sides of the glass for aesthetic purposes, but this is totally optional.
Step Five: Add The Steamed Milk
Gently pour the steamed milk into your mixture to finish your caffè mocha! Use a spoon to hold back the microfoams if you don’t prefer them in your drink. In the case that you do, you might find that some of the foams get stuck at the top when you pour.
Try to swirl it first to smoothen it out before you pour it again. You might want to check out our piece on these microbubbles to learn more about them!
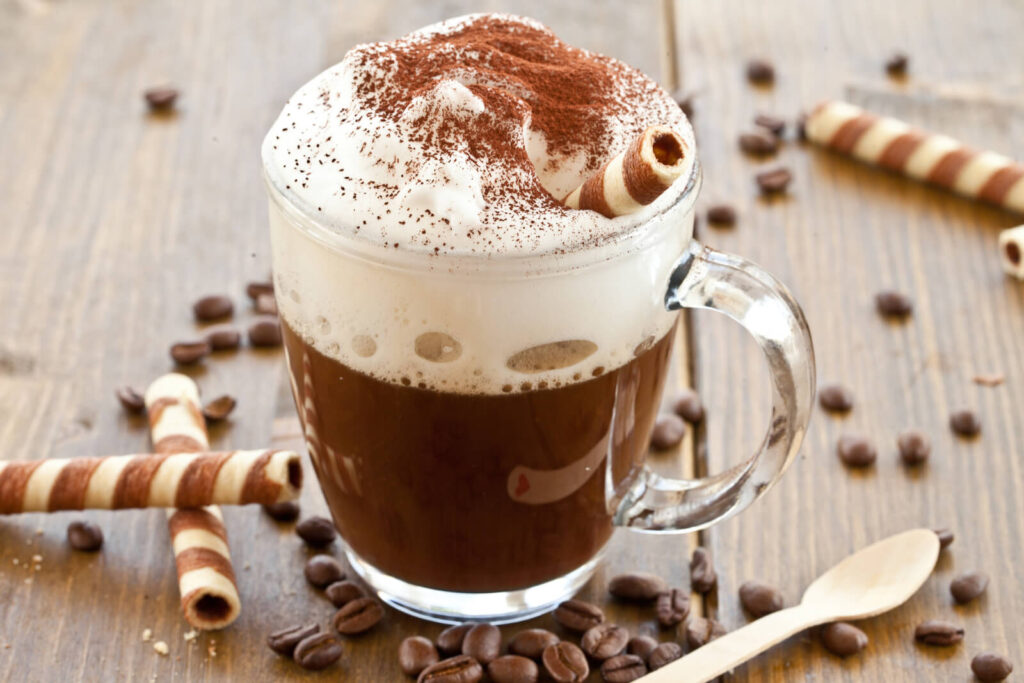
Step Six (Optional): Top Your Caffè Mocha Off
Add your instant whipped cream on top of your caffè mocha! Pour your chocolate syrup on top using a spoon and wiggle it for extra pizzazz, or simply sprinkle cinnamon or extra cocoa powder to garnish. If you are considering peppermint extract, I suggest you add it to the espresso and chocolate mixture in step four.
You can make your own whipped cream by using heavy cream. Whip it with your mixer for about three to five minutes or until you get your desired consistency. It will take longer if you are whisking it manually, and it will take you around seven to ten minutes.
Variations Of Caffè Mocha
You can find different variations of caffè mocha which you can make yourself! For instance, you can opt to use white chocolate instead for a creamier and buttery flavor. You might want to use skim milk for this one to mask off the sweetness and omit the whipped cream to reduce the amount of fat in your beverage.
There is also the mochaccino which uses two espresso shots but has the same amount of chocolate in it for a bolder and stronger flavor.
An interesting variant is the tuxedo mocha, which uses a combination of milk or dark chocolate sauce and white chocolate sauce. This is topped off with chocolate whipped cream that covers half the top of the glass, while the regular whipped cream covers the other half.
If you don’t have an espresso machine or can’t be bothered to make an espresso shot with other equipment, your usual, regular cup of Joe can also be used to make a caffè mocha! It won’t taste as robust, but it is an ideal alternative if you are aiming for a quick cup.
Don’t confuse a latte with a mocha! You might want to check out the difference by reading our comparison article on these two beverages!