Most coffee lovers know that the growing environment impacts the taste, but the roast level is equally important. Let’s learn more about the coffee bean roasting guide.
Those who don’t drink coffee might think it all tastes the same, but this couldn’t be further from the truth. Not only does the type of coffee bean, whether it’s Arabica or Robusta, impact the taste, but the growing conditions factor too. However, the most significant influence on the flavor is the roasting process. Learn more in our explainer on the types of coffee beans.
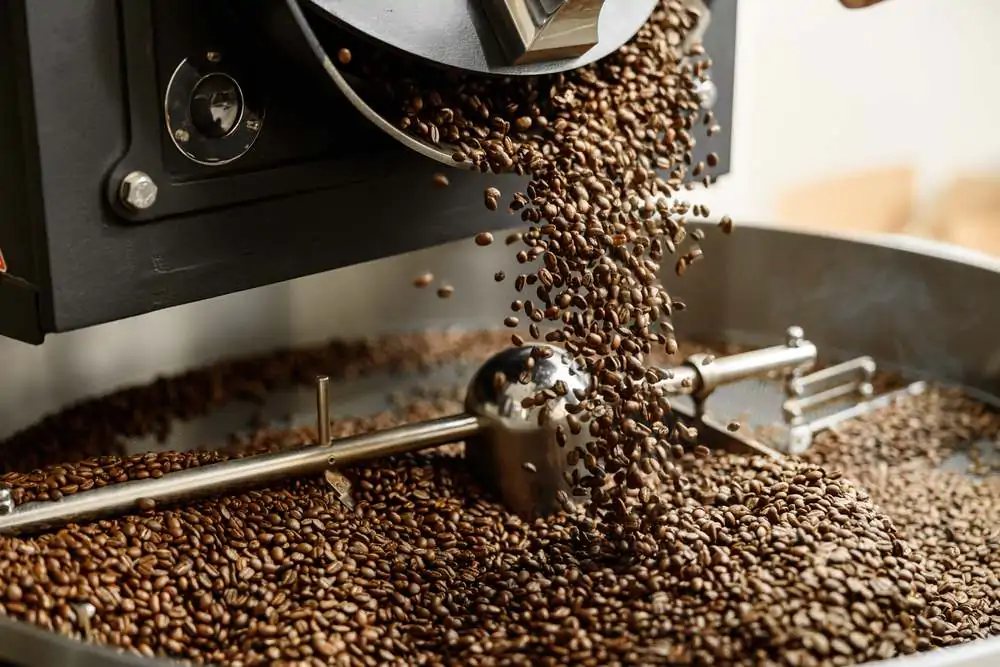
So what is coffee bean roasting? Roasting is a process that heats green coffee beans to make them more soluble so that they can be brewed. The roasting process also brings out more preferable flavors in the beans. Coffee roasting is considered an art, and numerous variables are involved, so there are different roast levels, from light to dark.
Why Are Coffee Beans Roasted?
Coffee beans are roasted for several reasons:
Flavor Development: Raw coffee beans have little to none of the taste we associate with the brewed beverage. The roasting process is what unlocks the rich flavors and aromas we love. The Maillard reaction and caramelization during roasting create a complex array of flavors and aromas in the coffee beans.
Reducing Acidity: Green coffee beans can be quite acidic. Roasting reduces this acidity and brings out the sweeter flavors in the beans.
Physical Transformation: Roasting causes beans to expand and become porous, which is ideal for brewing. The porous nature of roasted coffee beans allows for the efficient extraction of flavors when the coffee is brewed.
Removing Moisture: Green coffee beans contain moisture. Roasting helps to remove this moisture, which would otherwise dilute the flavors during brewing.
Shelf Life: Roasted beans have a longer shelf life than raw beans, though the freshness decreases over time once roasted. Many coffee aficionados prefer to buy whole beans and grind them right before brewing.
Safety: Roasting can also eliminate potential pathogens or contaminants that might be present on raw beans.
Decreasing Caffeine: The roasting process reduces the caffeine content in the beans, although not significantly. Darker roasts typically have slightly less caffeine than lighter roasts. Read our guide to caffeine fatigue.
Changing Bean Structure: The roasting process makes the beans brittle, facilitating grinding, which is essential for most brewing methods.
Cultural and Taste Preferences: Different cultures have varing preferences for different roast levels. For instance, Italian espresso often uses a darker roast, while some Scandinavian countries prefer lighter roasts.
Aesthetic Appeal: Roasted beans take on a rich, brown color and have a pleasing aroma, making the beverage more appealing to many consumers.
The Science Of Coffee Bean Roasting
There are multiple stages of the coffee roasting process. In the first one, the yellowing or drying stage, the beans lose their green hue as moisture is absorbed and chlorophyll starts to break down. You’ll notice the beans turning yellow or gray.
In the second stage, the Maillard reaction takes place. This is when the sugars in the beans begin to caramelize while proteins react to the heat, allowing complex aromas and flavors to develop in the coffee. The beans will start to turn light brown at this point. The first crack occurs when the beans’ external temperature reaches around 385°F to 405°F. Much of the beans’ moisture has converted to steam at this stage. This creates pressure, causing them to crack.
The first crack makes the beans porous, making extracting the compounds from your coffee during the brewing process easier. The second crack occurs when the beans’ external temperature hits 440°F to 455°F. During the roasting process, carbon dioxide builds up in the bean; since the first crack makes it more brittle, the second crack occurs to release the accumulated gases.
How To Roast Coffee Beans At Home
There are several methods for roasting coffee beans. If you don’t own a roasting machine, like a drum roaster, you can use your oven, a popcorn machine, or a pan for home roasting. You might find our guide on the best coffee roasters for roasting coffee at home helpful.
Roasting Coffee Beans In The Oven
Materials Needed
- Green coffee
- Perforated baking tray
- Plate or bowl
- Sieve or colander
Method
Step 1: Preheat Your Oven
Preheat your oven to approximately 480°F. This should take between ten to 15 minutes.
Step 2: Open Your Windows
It’s normal for the green beans to release some smoke and steam during the roasting process, even if they’re not burning. To prevent your fire alarm from going off, open some windows before you get started.
Step 3: Spread Out The Coffee Beans
While your oven is preheating, spread your coffee beans on your baking tray. The beans can touch, but make sure none are on top of each other, as this can prevent you from getting an even roast.
Ideally, it would be best to use a baking tray with holes to allow air to pass through during the roasting process; this helps you achieve a uniform roast. If you don’t have a perforated baking tray, you’ll have to turn your coffee beans more often, which can prolong the process as your oven will lose heat when you open it.
Step 4: Place Your Baking Tray In The Oven
Once your oven has preheated, it’s time to put the coffee in. If your oven heats unevenly, you must stir the beans often. Otherwise, you’ll only have to stir them if you see the colors changing at different rates.
Step 5: Listen Carefully & Remove At Desired Roast Level
The roast time will vary depending on the kind of coffee you’re hoping to make.
After around five to ten minutes, you will hear the first crack. This signals that your beans have reached light roast level. If this is your desired roast, you can immediately take them out of the oven.
The roast level changes quickly, so you must pay close attention to the beans. A standard medium roast is created after the first crack but not fully into the second crack. For medium-dark, you can wait until the second crack.
If you want a dark roast, leave the beans in the oven until right after the second crack, but remove it from the heat within a minute to prevent your coffee from burning. Burnt beans are black and will smell smokey.
Step 6: Allow The Beans To Cool
After removing the beans from the oven, it’s best to take them off the hot baking tray to prevent further roasting. Add them to a new baking tray, a plate, or a bowl until they reach room temperature.
Step 7: Remove The Chaff
The chaff is dried skin on the coffee bean. Although it won’t ruin your coffee if there is a little bit left, chaff doesn’t taste pleasant, so as much as possible should be removed.
One of the easiest ways to eliminate the chaff is to put your beans in a sieve or colander and shake it over a bowl, allowing the skin to flake off. Some people prefer to pour the beans back and forth between two colanders to dislodge the chaff.
Step 8: Degas Your Beans
Although you can brew your fresh roast coffee immediately, it’s better to wait. The beans need time for the flavors to develop fully and for carbon dioxide to escape, known as degassing.
It can take a few days for the gas to leave the beans, so for best results, hold off for at least 48 to 78 hours to allow most of the CO2 out. Then you can grind them and brew your coffee like normal. After this, store them in an opaque, sealed container to maintain their freshness.
Roasting Coffee Beans In A Popcorn Machine
Materials Needed
- Popcorn popper
- Bowl
- Sieve or colander
- Green coffee beans
Step 1: Preheat Your Popcorn Popper
Before roasting your beans, you must preheat your popcorn machine. This generally takes only a minute or two. You can use a hot-air popcorn popper or a stovetop one to roast coffee. A hot air device uses a heating element and fan to pop the popcorn, while a stovetop is more like a saucepan.
Step 2: Ventilate The Room
Regardless of the type of popcorn popper you own, you still need to open your windows and ensure the room is well-ventilated before roasting the coffee beans. If you have a wireless hot-air popper, you can even use it outside. For hot air poppers, it’s best to use one with vents on the side instead of the bottom to ensure consistent airflow during brewing.
Step 3: Add The Beans
You can add the beans once your popcorn machine is turned on and preheated. If you’re using a hot air popcorn popper, the beans will circulate the container as the hot air passes through them. The movement allows them to roast evenly.
You’ll have to crank the lever continuously for the same effect for a stovetop popcorn maker. As for how much coffee you can roast at once, you can use the equivalent amount of popcorn you can put in your device.
Step 4: Wait For The Crack
Like the previous method, you must listen for the first and second cracks and remove your coffee beans at the desired roast.
Step 5: Cool The Beans
Remove the coffee beans from the popcorn machine and allow them to cool.
Step 6: Remove The Chaff
You can use the same methods as above to remove the chaff.
Step 7: Degas & Enjoy
Allow the beans to degas before brewing.
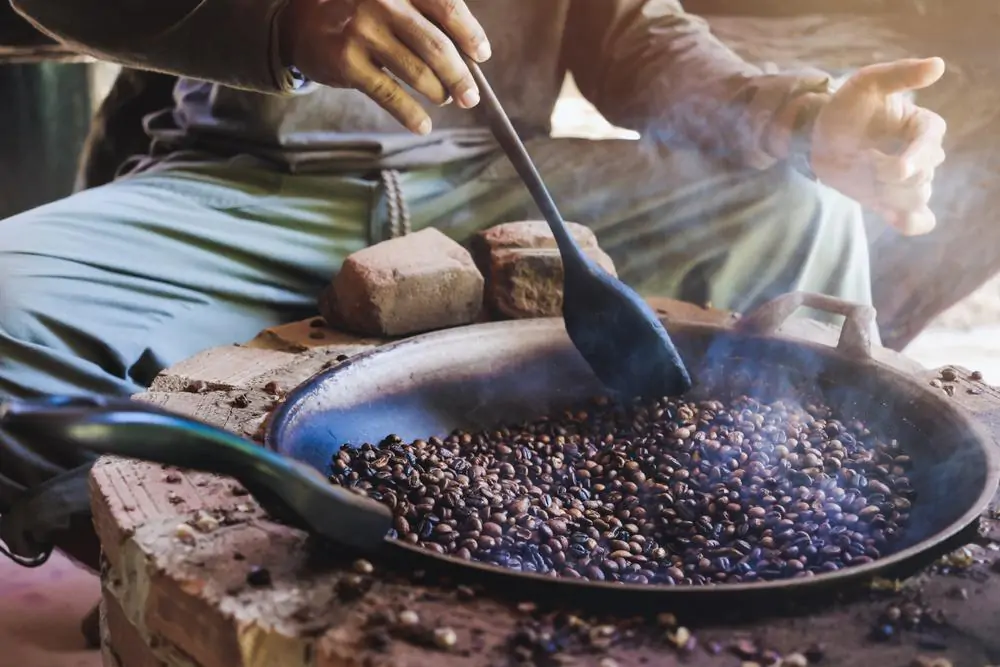
Roasting Coffee Beans In A Pan
Materials Needed
- Pan with a perforated lid
- Sieve or colander
- Stove thermometer (optional)
- Green coffee beans
- Baking tray, bowl, or plate
Step 1: Preheat Your Pan
Like using an oven, you must preheat your pan to roast coffee beans. Turn on your stove and set it to medium heat. Do not let the pan’s temperature go higher than 500°F, as this will burn the coffee.
There is no need to add oil. You should also turn on the fan above your stove and ensure the kitchen is well-ventilated, as this roasting process still emits smoke.
Step 2: Add The Coffee
Once the pan has preheated, you can add the coffee beans. If you’re worried it’s too hot, check with a stove thermometer first. Pour enough coffee for the beans to lay on each other. This is because a single layer would burn more quickly as the beans spend more time directly in contact with the pan. However, don’t add so many beans that moving them around is hard.
Shake the pan, keeping the lid on, throughout the process to shift to beans to ensure they roast evenly. The lid should be perforated to allow some smoke out, but holes shouldn’t be so big the coffee beans can escape when you shake it.
Step 3: Wait For The Cracks
Pay attention to the color of the beans and listen carefully for the first crack. Remove the beans from the heat once you reach your desired roast level.
Step 4: Allow Them To Cool
To prevent further roasting, remove the beans from the pan and allow them to cool.
Step 5: Remove The Chaff
Since the beans were shaken during the roasting process, some of the chaff will have fallen off already. You can pass the beans between two colanders to get rid of the rest of the chaff.
Step 6: Degas & Brew
Once you have allowed your beans to degas, you can go ahead and brew.
Different Types Of Roast Profiles
As mentioned earlier, there are four main kinds of roasts: light roast, medium roast, medium-dark roast, and dark roast.
Since a light roast is the least processed, it allows more of the properties of the green coffee beans to remain. It has floral aromas with a sweet, fruity flavor profile. Lighter roasts also have thinner bodies.
Medium roast coffee is the most appealing to the average coffee drinker; it’s smooth and rich without overpowering. There are often hints of chocolate, nuts, and a little sweetness. Medium-dark roast is the best of both worlds; they’re robust but still have mouth-watering notes of chocolate and caramel. They have a little oil, but not as much as dark roasts.
Dark roast coffee is bold and full-bodied. It’s a little bitter and smokey. During roasting, oils within the beans rise to the surface to give dark roasts their signature shiny appearance.
These oils can clog your grinders, so handle dark roasts with care. In addition to these four basic roasts, you might also find:
- Light City roast: A Half City roast or Cinnamon roast is a very light roast pulled from the roaster early in the first crack. The term cinnamon is used to refer to the color of the beans, not the taste. These roasts are delicate, with a bit of acidity and fruity notes, but they can sometimes be on the grassy side.
- City roast: Sometimes referred to as a New England roast, this medium roast is removed from the heat immediately after the first crack, so it’s on the lighter side of the medium spectrum. A City roast has a sweet flavor profile and a light body. It’s often described as winey.
- Full City roast: This medium-dark coffee is roasted until the very early stages of the second crack. A Full City roast is smooth with slight acidity and hints of toasted nuts and chocolate.
- American roast: Most Americans prefer medium roast coffee, so American roast is simply another name for it.
- Vienna roast: Also called a Viennese roast, this dark roast can go through the second crack, but the roasting process is halted before the surface is thoroughly oily. A Vienna roast is dense with smokey aromas and dark chocolate notes.
- French roast: This roast is slightly darker than Vienna coffee. French roasts are heavy and malty.
- Italian roast: Given that Italy is the home of espresso, it’s no surprise that an Italian roast is an exceptionally dark roast, cooked until after the second crack passes. These roasts have a full body and a deep smokey taste with just a little sweetness.
What Is Espresso Roast?
You might have also seen coffee beans labeled as espresso roast, but this is just a way for brands to suggest their coffee can be used to make espresso. There is no specific roasting level known as an espresso roast; a bag of coffee labeled an espresso roast is simply a dark roast.
Generally, people consider lighter roasts better for filtered coffee as it’s less soluble, requiring a slower brewing process. Darker roasts are better for espresso because the flavors can be extracted faster. Learn more in our espresso shots explainer.
Roast Levels And Caffeine
You may have heard conflicting statements about light roasts containing the most caffeine, with other coffee drinkers being adamant that dark roasts are more caffeinated. The truth is that neither roast inherently has more caffeine than the other, as caffeine levels don’t change much during the roasting process.
Light roasts retain more moisture as they’re exposed to high temperatures for the least time. This makes them denser than dark roasts. So, a light roast will make a more caffeinated drink if you use a scoop to measure your coffee before brewing. Since dark roast expands during the roasting process but is less dense, there will be less coffee in the scoop and, by extension, less caffeine. If you’re using a weighing scale to prepare your coffee, there will be minimal difference in the caffeine content.
Can You Brew Coffee With Green Coffee Beans?
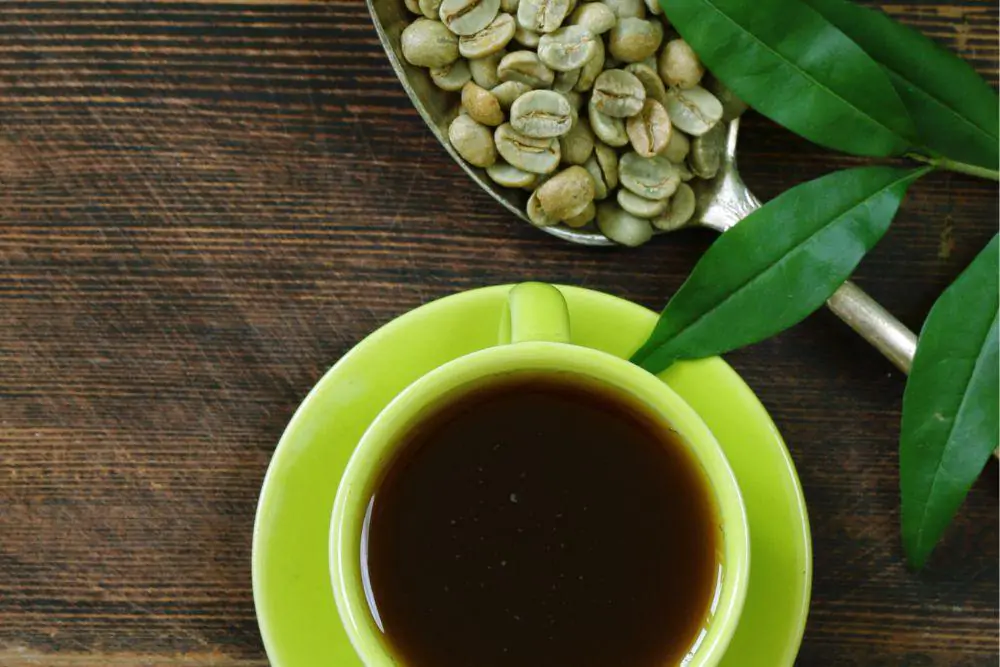
You can brew coffee with green coffee beans, but it won’t taste classic. It tends to be grassy and acidic. Green coffee’s taste is often compared to green tea. The final product even looks more like green tea than coffee.
One of the reasons people drink green coffee is because of the purported health benefits. Roasting coffee may reduce the antioxidant activity, but it doesn’t halt it altogether, so there’s no need to switch to green coffee if you don’t like it.
Since coffee is roasted in the first place to make it more soluble, if you want to use unroasted beans, you must first steep them in water overnight to soften them. Most people use whole beans to brew green coffee as they are much harder in this form, making them difficult to grind. Then, boil water on a stove and add the beans, using around 20 grams of coffee for every 300 milliliters of water. Allow them to simmer for up to 15 minutes before straining and serving.