You can stop worrying about the drips and the bitterness. Here are some Sage Barista espresso tips and tricks you can follow to brew a rich espresso.
Operating a new device can make anyone giddy, especially if you have saved for it for years. In my case, I allocate a significant amount of time to learning my new smartphone’s special features and settings.
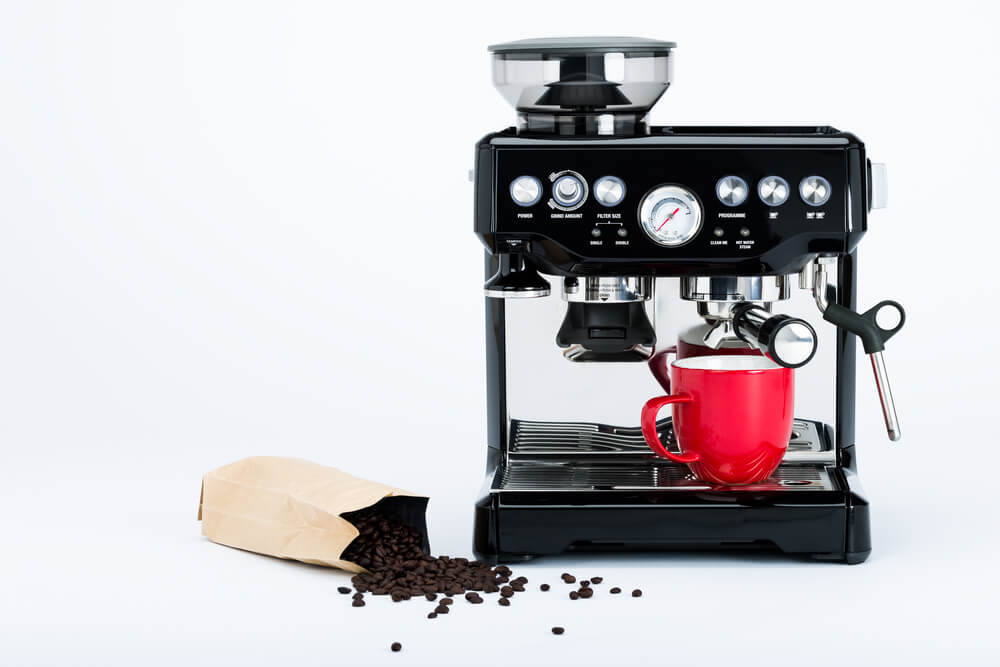
Espresso machines such as Sage Barista products are no different. Before you can utilize its full potential, you need to understand how it works.
There is a manual to refer to, but I have learned that personal experience from Sage owners can also impart insightful tips on avoiding common issues and brewing yourself a delicious cup of Joe. Here are some of them.
Step 1: Wait For The Flash
Don’t get too excited by pressing the brewing button, as you might enter a manual program customization mode without your knowledge. Wait for the light to flash on the single or double shot button before pressing it to brew and dispense the coffee. Note that excessive pressing can contribute to wear and tear of the button.
Step 2: Let It Drip
We don’t want to waste any precious coffee. Allow at least 25 to 35 seconds for the coffee to fully dispense or until the dripping stops. You might notice that the button will start blinking during the brewing process and will automatically stop, but this isn’t a clear indicator that it stopped dispensing.
Step 3: Use The Gauge As A Guide
The pressure gauge is a good indicator if your pull is within the “espresso range,” which is around 12 o’clock on the dial.
However, if it is within the range but still doesn’t come out right, you have to adjust manually and take note of where the gauge is pointing. Then, if your espresso comes out quick and too watery, adjust your grind settings and go for finer grounds. If it comes out slow, go for coarser.
Step 4: Use Freshly Roasted Coffee Beans
It goes without saying that freshly roasted coffee beans offer the best flavor. I am not saying you should brew right after you get it from the roaster. You can let it rest for three days up to a week for the best-tasting espresso.
The maximum time you can store it before it loses its natural properties can be up to four weeks. It is pricier, but for the flavor, it is worth it. You can also check our list of common coffee roasting defects you should look out for.
Step 5: Know Your Grind Before Brewing
Grind your beans accordingly after you determine what coffee you will be brewing. Coarsely ground beans are best for French press, while finely ground beans are best for espresso.
However, most built-in Sage Barista grinders are programmed for espresso, so its grind setting can be a little bit too fine. Use a separate grinder if you are going for French Press. You can check out our list of the best coffee grinders for French press and buy yourself one!
Step 6: Use The Right Glass
I will advise using a standard espresso shot glass, such as a three-ounce demitasse cup. You can opt for the two-ounce, but you never know when the double-shot craving will hit you. The usual eight-ounce coffee glass works too, but anything larger might not fit on the machine lest you remove the drip tray for more room.
Step 7: Secure The Water Tank
Always make sure the water tank lid is securely closed. Several things can happen if it is left open.
You run the risk of contaminating the water resulting in a less desirable espresso shot. It might introduce air which can clog your machine during the brewing process, or it can break your machine entirely. Remove these worst-case scenarios by simply securing the water tank.
Step 8: Weigh Your Ground Coffee
Some coffee beans can be denser and will have more volume when grounded, so it is best to weigh your ground coffee to get that golden ratio and achieve a delicious espresso shot. Your baskets can help you gauge how much coffee should go in. A single basket can hold around seven to ten grams, a double basket around 16 to 18 grams, while a triple one should hold 20 to 22 grams.
Step 9: Fill The Water Tank At Night
We can be a bit groggy when we wake up, and the last thing we need is spilling water all over the place. Fill the water tank at night to ensure it is ready to use in the morning. You can also grind your coffee beans in advance but make sure you brew it the next day.
Step 10: Create A Flat Bed Of Coffee Grounds
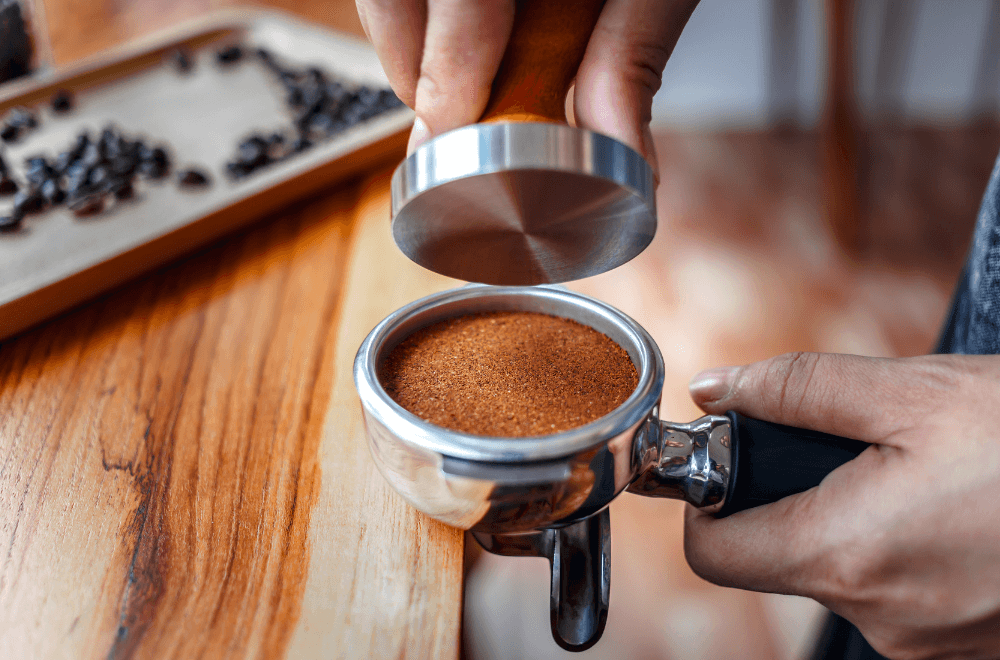
During your tamping process, it should create a flat and level “bed” of coffee grounds. This ensures that the water is evenly distributed once you pull.
Having an uneven bed will result in an over or under-extraction and will affect the espresso’s flavor. Check that your grind size is consistent and adjust your grind setting if it is not.
Step 11: Use The Correct Coffee Basket
The espresso machine usually comes with four coffee baskets. These are the single wall and double wall that comes in two sizes; a single shot and a double shot.
The double wall is best for beginners using pre-ground coffee as it can take additional pressure to ensure the water flows evenly to your grounds, even if it isn’t flat.
The single wall is preferred by experienced ones. Using this requires attention to the type of grind and the coffee beans used. It allows for more control, but you have to study each brew to extract more flavor from your grounds.
Step 12: Purchase A Tamping Mat
A tamping mat can prevent dents or scratches to your surface while you apply the appropriate tamping pressure. Tamping will create a flat and level bed, so a mat that can hold your basket in place is important. A tamping mat made from high-quality rubber or silicone should do the trick.
Step 13: Purge The Steam Wand
Before using it to steam milk, it’s important to purge the steam wand by releasing a burst of steam. You can do this by turning the steam dial to the steam selection (usually, it is to the left). Make sure your steam wand is pointed at the drip tray before you purge.
Purging helps to remove any residual water that may have been collected in the wand, which can affect the temperature and texture of the milk. You can read our steam wand explainer to learn more about this device.
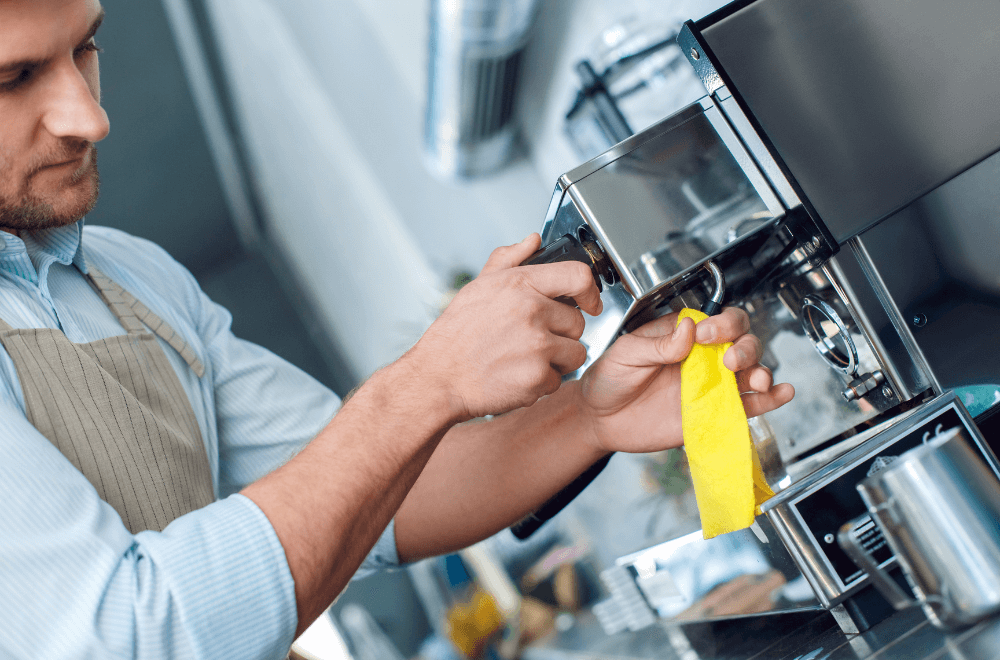
Step 14: Clean The Steam Wand
You should clean the steam wand immediately after use. You can use a clean, damp cloth to wipe the remaining froth. You should do this before you purge to avoid spraying water around your workspace.
Step 15: Clean Your Machine Regularly
If you brew five or more cups per day, you need to clean your machine regularly. Wash out the tray and empty it every few days. As for the grinder and the water tank, it is recommended to clean them every two to three weeks.
The great thing about the Sage Barista is that it has a built-in cleaning cycle which you have to activate around once a month. Alternatively, the machine will inform the user if a cleaning is needed by letting the clean descale light blink. An in-depth cleaning instruction is available in the manual, or you can check out the instructional videos uploaded by Sage Appliances online. For more options, read our guide to Sage Barista alternatives.