All you need to know about how to use paper filter coffee maker (2 METHODS EXPLAINED). Read on to have detailed information.
Coffee is the world’s favorite day starter. A nice caffeine boost to get you fired up and ready for the day is never a bad idea. When it comes time to pick which method you are going to use to brew your coffee daily, you have tons of options.
However, with using paper filters, the options become more limited. A paper filter coffee maker is one of the most commonly used options to brew coffee around the world. It’s also what we are going to take the time to discuss and break down for you in this post.
Let’s dive into some of the benefits of using a paper filter coffee maker and give you a step-by-step guide to ensuring you create the best possible cup of coffee you can.
It may seem easy, but if you have never done it, you may be asking yourself the same question I had when I first purchased the coffee maker and got it ready to use. How do I use a paper filter coffee maker? After doing it hundreds of times using 2 different methods, here is what I’ve learned over time through trial and error.
So, how do you use paper filter coffee maker?
First, it depends on which method you choose. You have a standard coffee maker and a Chemex brewing method that can be used. Both will have different approaches.
The universal piece of the puzzle is that both methods require using a paper filter in some fashion before the brew is completed.
So, How Do You Make Coffee With Filter Paper?
The Standard Coffee Maker Method
Using a standard coffee maker is the most universally used method for brewing coffee. Standard coffee makers aren’t only affordable, but they are sold in nearly every brick and mortar store across the world. They are cheap and for the most part, straightforward to learn and brew coffee in a fast fashion.
Let’s break down the steps start to finish for brewing a cup of coffee using this method.
The Steps On How To Use Paper Filter Coffee Makers – Broken Down
Step #1- Purchase and Plug It In- Get Familiar With Your Coffee Maker.
First and foremost, you are going to need to purchase the standard paper filter coffee maker like this. You can find them almost anywhere including Amazon for relatively cheap. Once it has arrived, read over the instructions and get the coffee maker plugged into the wall or a standard wall outlet.
Step #2- Fill Your Water Tank/ Reservoir and Get Ready for The Brew.
Nearly all standard paper filter coffee makers will have a tank or water reservoir of some sort. Before beginning, you need to fill the water tank/reservoir. Your primary goal with this is to fill it to the desired level or “number of cups” you intend on having.
These water tanks will be labeled on one side with the number of cups and “fill lines.”
You can watch as you fill it with water and fill to the desired level. If you intend on drinking coffee throughout the day, you may want to fill the tank to the fullest level. For the cost of grinds and filters, it’s not going to break the bank to waste a cup or two if it ends up not being consumed during the day.
You should always use clean filtered water if you are looking for the best overall taste. Also, filtered water will help eliminate mineral deposits building up or damaging the coffee maker over time.
Step #3- Put the Filter To Work or Insert Your Paper Filter into The Filter Pull Out Compartment.
Your coffee maker will come with a flat-bottomed plastic compartment designed for you to place your filter inside of. In most circumstances, it will be located on the top of the coffee maker and you usually either lift it open from the top or slide it out towards you. Locate and open this compartment.
This is when you can insert your paper filter. (These compartments will also allow for the reusable, washable mesh filters). For the sake of this post, we are only focused on the benefits and uses of paper filters.
When inserting the paper filter, make sure it is large enough to fit into the slide out or compartment.
It’s also advisable to always wash and clean the holding compartment after each use to ensure you don’t cause buildup or other issues with the coffee maker over time.
Step #4- Begin Measuring Out the Coffee Grinds
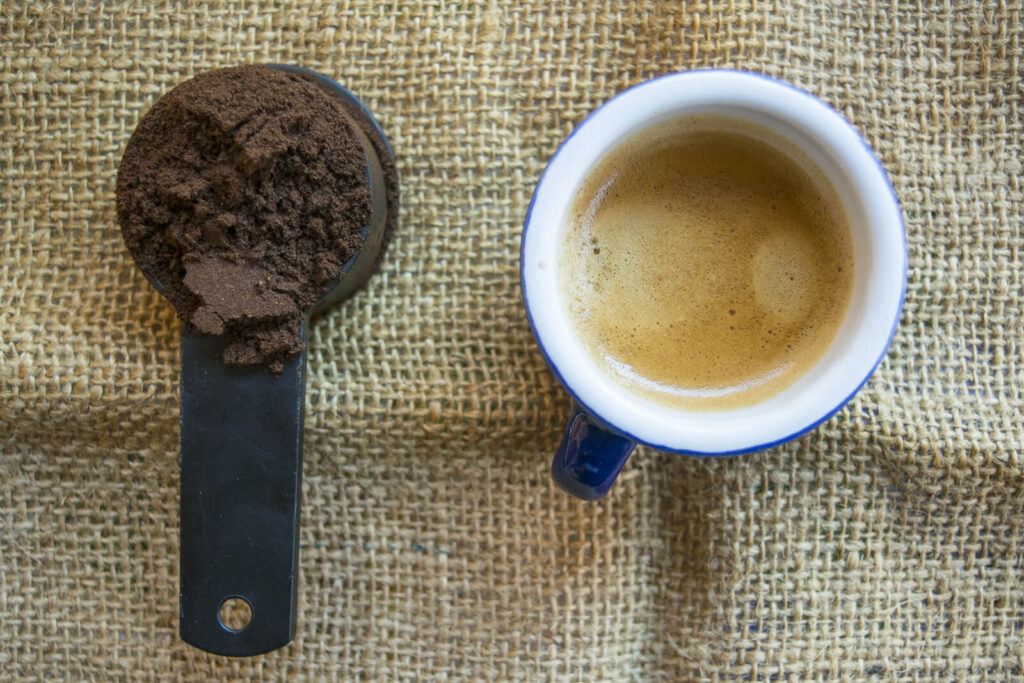
Now it’s time to measure out the coffee. For some of us or the individuals who have been using this method for a long time, it becomes more of a “number of scoops” method compared to measuring out the grinds in an exact fashion. However, for the beginner, a good starting point would be 1 large scoop of grinds per 5 ounces of water.
Adjusting this ratio will determine the overall strength of your coffee. More grinds will create a stronger brew and fewer grinds will produce a weaker brew.
Step #5- Fire Up the Machine and Begin the Brewing Process
At this stage of the process, your almost ready to enjoy a nice cup of coffee. All you need to do is start the machine (after making sure it’s plugged in). The coffee will begin dripping into your empty coffee pot below after the grinds are extracted through heat.
Once the desired number of cups has been dripped into the pot, you can turn the coffee maker off or place the coffee on a timer to shut off at the desired time.
Step #6- Be Sure to Shut Down the Coffee Maker After You Are Finished.
Once your brew is complete, you need to be sure to shut off the coffee maker. Leaving it on with no coffee left in the pot or even a small amount of coffee left in the pot could result in the bottom of the pot burning. This will create an odor in the home and be a tedious task to clean up if the coffee maker is left on.
The charred coffee pot bottom will take a scrub brush, hot water, and soap to get the film and burn marks to clean off thoroughly. If this doesn’t work, you can always try using a household degreaser to remove the burned bottom.
Step #7- The Final Step- Clean Up, and Regular Maintenance is Crucial.
Once your fully finished brewing, pouring and drinking your coffee, it’s important always to clean your coffee maker and the critical parts involved. Clean and rinse your coffee pot. Remove and discard the used filter and grinds and double check no grinds are clogging any drip/drain areas of the pot.
Give it a gentle wipe down, shut it down and have it ready for your next brew tomorrow.
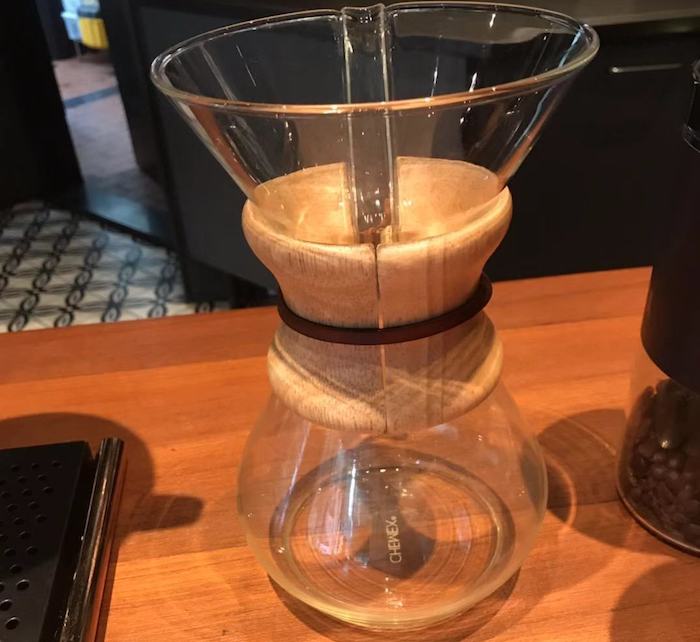
The Chemex Brewing Method
The Chemex method is going to be substantially different than using a standard paper filter coffee maker. Here’s a breakdown of the steps involved.
Step 1- Begin the Boil and Get Your Water to Temperature

Using the Chemex method (click to see my review), your first step is to boil a pot of water. Again, your best bet is to use clean, filtered water. This will ensure you are getting the absolute best taste possible.
For this step, you can use a kettle with a long spout. You want your water to reach roughly 200-205 degrees. Ensure you use caution when moving onto step 2.
Step #2- Preheat Your Chemex and Filter and Prepare for The Transfer and Pour
Step #2 will begin with unfolding your Chemex paper filter. The idea is to fold it just like a cone. Your cone-shaped paper filter will be placed in the top part of your Chemex.
Start by adding a touch of hot water over the filter to soak it. Ensure it immersed completely. Following this, you can pour out and discard the remaining liquid.
This step is explicitly designed to create an air-tight seal against the pot. Doing so will remove any paper taste from the coffee and preheats the pot. In addition, this is going to help prevent having any cold coffee as the final product.
Step #3- Time to Start Measuring Out the Coffee
In step 3, we are going to measure out the coffee. It’s good to use a scale to do this but not 100% necessary. 42 grams (6 tablespoons) of coffee is the ideal ratio for creating an 8-cup Chemex of coffee.
More can be added for additional strength. This is also assuming you are using medium course grounds.
Like any coffee, grinding the beans before use creates the best taste but it’s surely not a requirement. If you use store-purchased coffee grinds, just make sure to keep an appropriate container that seals tightly for optimal results.
Step #4- Get the Chemex Ready for Use
In step 4, you are going to transfer the grounds into the pre-soaked filter. This should still be waiting for use and resting on the top of your Chemex. You can place the Chemex on a scale, and you will also want a timer that you can start after the pour is complete.
This is due to using no electronic devices like a standard paper filter coffee maker. The method of using the Chemex is more old school, and you’re relying on yourself to create the perfect brew. The scale is to help measure out the amount of water being added to the Chemex.
Step #5- Get the Water Ready for The Pour and Get Out the Stopwatch.
Once you are ready to pour your water, you can start your timer. Pour roughly 2/3 cups or 150 grams of hot water over the grounds into the filter.
Step #6- Give It A Nice and Gentle Stir.
Once you have poured the water over the grounds and filter, use a spoon or something like a spoon and give the grounds a nice and gentle stir. This helps to ensure that no grounds will clump and that all grounds are 100% saturated. Skipping this step can result in less flavor filled coffee or reduced strength.
Step #7- Stay Patient and Finish the Water Pour.

In step 7, we are going to wait about 45 additional seconds and pour 2.5 cups of extra water over the grounds. At this point, you should visually see water almost coming out of the top of the Chemex. Give it a slight shake to make sure the coffee grounds and water are blending well together within the Chemex.
Step #8- Repeat Step #7- More Water and Another Shake.
Step #8 is going to be a repeat of step #7. In this step, you want to add the remaining water to fill your Chemex completely. You can give it another slight shake to get a good blend and mix. If you are using a scale, your Chemex should now be close to reading 700 total grams.
Step #9- Allow the Coffee Time to Brew.
Step #9 is the brewing phase. During this phase, the water will be moving through the coffee grounds and the paper filter and into your Chemex. This strongly resembles brewing coffee in a regular coffee maker.
During this phase, it shouldn’t take more than 5 minutes to have your finished coffee ready to pour into a cup and ready to consume.
Step #10- Remove Filter- Clean Up and Enjoy Your Coffee.
Congratulations. You’re finished. You can now remove the filter and pour your coffee into your favorite coffee mug.
Clean your Chemex after use and have it ready to re-begin the process the next time you’re in the mood for a nice cup of coffee.
Be sure to be as diligent with your Chemex as you would with any other method of brewing coffee. Clean your Chemex after use, remove the filter and start fresh during your next brew.
Now let’s touch on some other frequently asked questions and benefits from using paper filters when brewing your coffee.
Why Should You Use Paper Filter Coffee Makers – What Are The Benefits?
Why should we use paper filters when brewing coffee? Do we gain any substantial benefits in doing so? Some would say yes, you do gain significant benefits when using a paper filter during the brewing process with coffee. First, the paper filters help block oily substances. These are known as diterpenes. Diterpenes come in 2 commonly known variations. Cafestol and Kahweol.
So, What’s The Deal With Cafestol And Kahweol? What Benefits Can This Add To My Coffee?
I’m sure you’re probably wondering why this would make a difference and what significance this can have on your coffee. For starters, when these substances aren’t filtered out of your coffee and escape into your morning cup of Joe, you have a few health impacts. The first being cholesterol-regulating receptors being blocked in the intestines.
In a study performed by Harvard Health Publications, it was confirmed that when coffee doesn’t filter, and you allow these substances to float on the surface of your cup, that you may have the cholesterol-receptors blocked.

Also, it’s shown that skipping the filter when brewing coffee can lead to overall increased cholesterol. 6-8% higher cholesterol levels can be expected if you consume non-filtered coffee 4 times per day (4 8oz cups per day). Higher cholesterol leads to more plaque buildup throughout your blood vessels which ultimately leads to a higher chance of stroke, heart attack, and high blood pressure.
Which One Is Best And Are Paper Filters The Best Option?
Paper filters have been shown to be the best concerning effectiveness for eliminating the substances discussed previously. Paper filters also do the best at creating the least amount of work regarding clean-up and maintenance. Also, paper filters have always been known as the crowd favorite due to being environmentally friendly, made of natural substances, and are 100% bio-degradable.
A Hidden Benefit Of Using Paper Coffee Filters You May Has Not Thought Of!
Using paper filters for brewing coffee comes with a few extra perks that you may have not even considered. First, paper coffee filters make for an excellent lint remover and are universally used to clean windows, mirrors, and other glass items around the house.
What’s Your Favorite Method For Brewing Coffee Using A Paper Filter?
It’s clear to see that not only are paper filters cheap and easy to use, but they also provide many benefits for your health. The paper filter solution has been used for years and is still a favorite among most coffee drinkers’ homes around the world.
Of course, new technology is always emerging. We all know about the Keurig’s and fancy espresso machines, but it seems there will still be a place for the old school water, and paper filter methods.
Outside of the health benefits involved, clean-up is always fast and easy and you are never more than 5 minutes away from 8-12 cups of freshly brewed coffee at your desired strength and flavor. It doesn’t get much better than that. You might also be interested in our Moka Pot. Vs. Filter Coffee guide.
What’s your favorite method for brewing coffee while using paper filters? Do You prefer the standard/traditional coffee maker approach or enjoy using the Chemex strategy?