Learn how to store AeroPress with this comprehensive guide. Learn how to properly clean, dry, and store your coffee maker to keep it brewing delicious cups for years to come. Explore two convenient storage methods and never lose a filter cap again.”s article contains our full 5 step guide on how to store AeroPress to keep the coffee flowing!
The AeroPress is the speedy champion of the coffee world, brewing sumptuously flavored cups in a flash. If you’re a fan of French press coffee’s rich taste and silky taste but can’t spare time, the AeroPress is your go-to brewing device. To find out why read our AeroPress review.
AeroPress provides a filter holder and tote bag for storing an AeroPress and bringing it with you. This brewing device also disassembles easily for storage in a shelf or drawer.
To ensure your AeroPress maintains its top-notch performance, read on! We’re going to explore the right ways to clean and store this ingenious coffeemaker. You might also be interested in learning how to clean glass coffee pots.
Storing An AeroPress: Method 1
There are two ways to store AeroPress, and I’ll walk you through both of them. I’ll start by explaining how to prep it for storage, and then I’ll jump right into the first method: store AeroPress with the plunger in the chamber. This method is great if you’re looking to save space, but it can make losing the filter cap easy. If you’re scatterbrained like me and you want to avoid losing it, try method two.
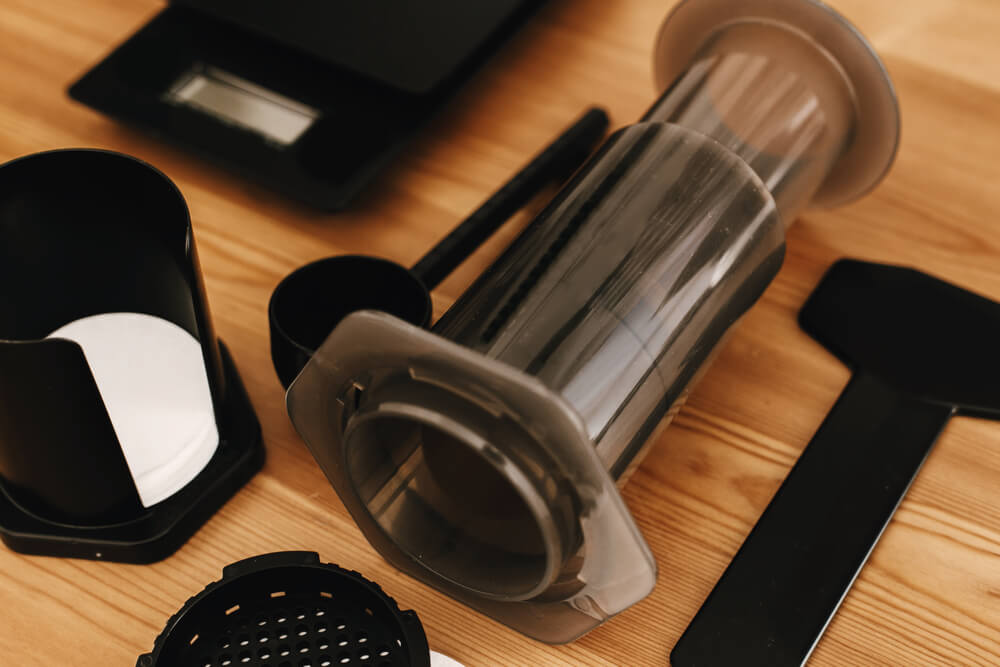
Step 1: Dislodge the Coffee Grounds and Clean Your AeroPress
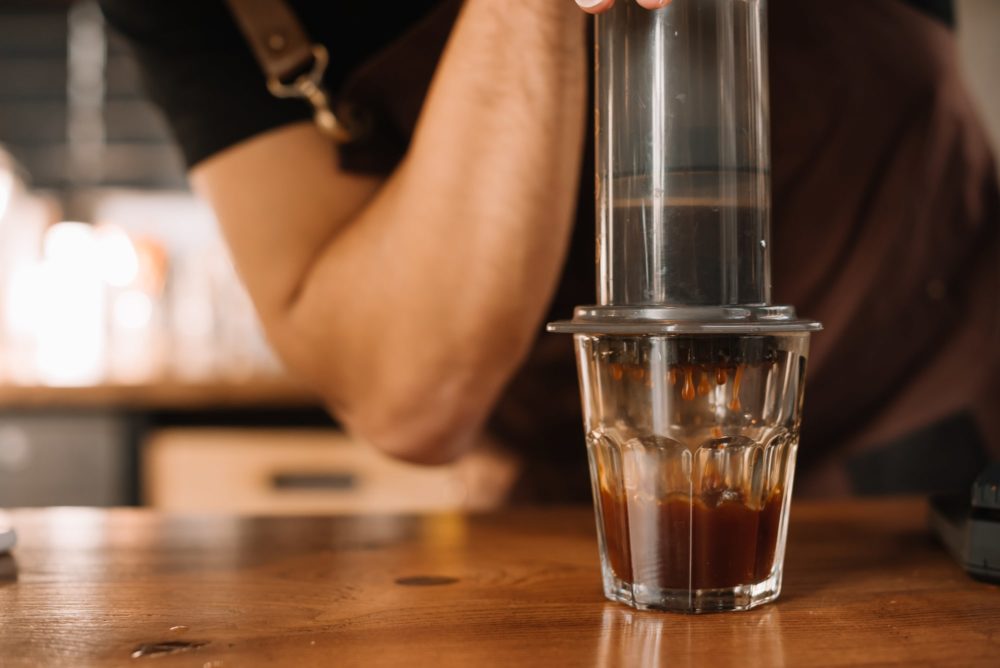
Immediately after you’ve brewed your coffee, detach the coffee filter cap and rinse it individually. This prevents the coffee acids from damaging it. Then, use the plunger to eject the coffee grounds and rinse your AeroPress thoroughly, ensuring no residual grounds remain.
To make rinsing easier, you can use the plunger to press the water through. If the plunger sticks, some vinegar during the rinse will provide a more thorough cleaning. However, it’s best not to frequently wash your AeroPress in the dishwasher to prevent potential damage.
Before reassembling, ensure it’s completely dry. Blot it dry by hand instead of air-drying it. This helps prevent hard water from creating abrasive mineral deposits that could gradually wear out your AeroPress.
Remember, the path to long-lasting AeroPress goodness doesn’t end when brewing a quick cup of coffee. Proper cleaning and drying before storage ensure your trusty coffeemaker continues serving up those delightful caffeinated moments!
Step 2: Clean the Seal
Carefully detach the seal from your AeroPress to avoid damage. Clean it using a mild soap (avoid abrasives as they might harm the rubber or silicone seal) and warm water, then blot it dry.
Be honest—when was the last time you cleaned your AeroPress seal? If it’s been a while, it’s high time you paid some attention to this often neglected component. Accumulated coffee residue can hinder the AeroPress’s performance and potentially cause long-term damage.
Step 3: Store the Filter Cap
Ensure the seal is entirely out of the chamber and free from any pressure before storing . If you damage or lose the filter cap, it’s easy and cheap to buy a replacement part on Amazon.
Step 4: Position the Plunger Outside the Chamber
Press the plunger through so that the seal is beyond the chamber. This prevents the seal from potential damage due to continuous pressure during storage. However, this requires the filter cap to be stored separately. Find a safe spot to keep your filter cap handy, yet secure from misplacement.
Step 5: Store Your AeroPress Safely
With the seal now safeguarded, it’s time to store your AeroPress. If it’s in daily use, it can comfortably sit on your counter. Avoid direct sunlight, though, as it could cause harm. Its compact size allows for convenient storage in a drawer or a cabinet. A stylish countertop storage solution can keep your filter cap and AeroPress securely stored together. If not in daily use, put it in the tote bag.
Storing An AeroPress: Method 2

If the fear of losing your filter cap keeps you up at night but you don’t mind slightly bulkier storage, this method’s for you. Keeping your AeroPress on the counter can add a touch of caffeinated charm to your kitchen decor and ensure it’s ready for a rapid coffee fix on those groggy mornings.
Step 1: Clean and Dry the AeroPress
Remove any filter paper and empty the coffee grounds from your AeroPress. Clean it with hot water above, ideally around 175–185 degrees Fahrenheit or 80–85 degrees Celsius. Now, dry it with a paper or tea towel.
Step 2: Reassemble Your Clean AeroPress
Put the dry plunger back into the AeroPress. Now, affix the cap.
Step 3: Put Your AeroPress Away
With the filter cap securely in place, your AeroPress—chamber and plunger—is ready for storage. You can store the AeroPress vertically in a cabinet or drawer alongside filter paper and coffee for easy access. You can also put all the parts into the provided tote bag.
Should you enjoy this piece, delve deeper into the coffee world by checking out our article on the Difference Between Inverted And Normal AeroPress brewing methods. If you liked this article check out the Difference Between Inverted And Normal Aeropress.