If you have raw cacao beans, you might be lost when it comes to what to do with them. Our guide on how to roast cacao beans will help you make delicious treats.
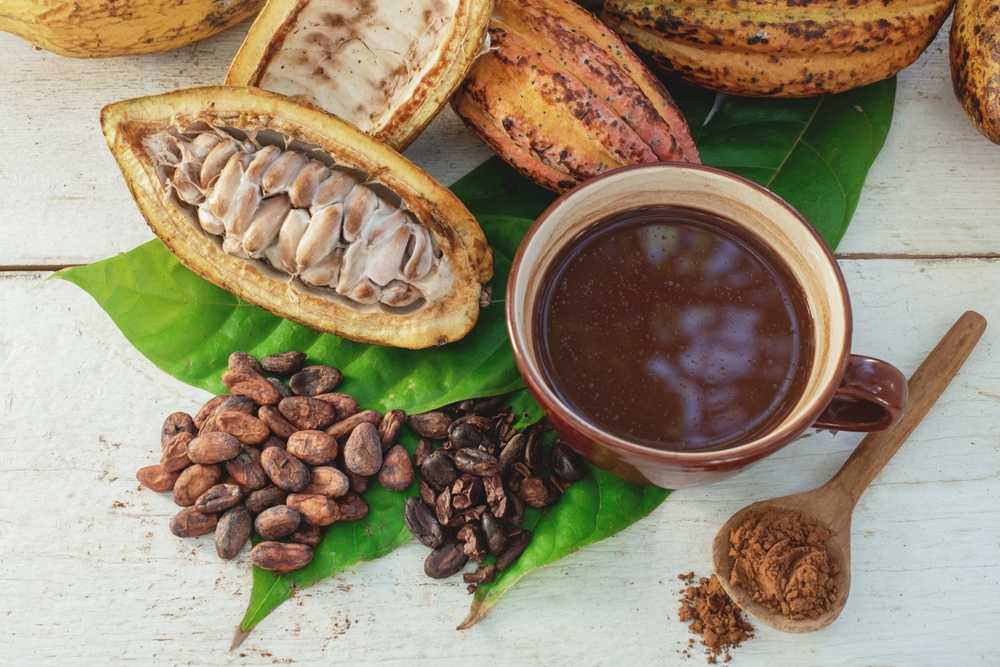
Cacao beans are the dried, fermented seed of the Theobroma cacao tree. The beans are used to create cacao solids and cacao butter, which is how we get chocolate. You’ll also see the terms cacao and cocoa used interchangeably, but they’re not exactly the same thing; cacao is used to describe raw beans, and cocoa is the term for the finished product.
You might also be wondering, can you eat raw coffee beans? We‘ve got that covered too, but for now, let’s focus on cacao.
Since many health gurus swear by raw cacao nibs, you might wonder why roast cacao beans at all. The main reasons are to develop the rich chocolatey taste we all know and love, evaporate any moisture, and sterilize the beans.
Understanding The Cacao Bean
Types Of Cacao Beans
Keeping track of cacao beans can get confusing. Although there are around ten varieties of cacao beans, there are three main kinds.
The three main types of cacao are Trinitario, Forastero, and Criollo.
- Criollo: This is one of the rarest varieties of cacao and is used in high-quality chocolate products. It doesn’t have the flavor profile casual chocolate lovers are familiar with but is mild and smooth, and its notes have been compared to bread and jam. It is believed to have originated in Central America.
- Forastero: The flavors we most commonly associate with chocolate come from Forastero beans. It makes sweet but Earthy chocolate. It is believed to have originated in South America, in the Amazon, and in the Guineas, but it is commonly grown in parts of Africa today.
- Trinitario: This type of bean is a hybrid of Criollo and Forastero and offers the best of both. It is named after Trinidad, as it began to grow after Forastero trees were introduced to a Criollo crop. Although there can be some variety in taste when it comes to this cacao, it usually makes chocolate that is delicate, Earthy and has hints of spices like cinnamon. It is not as rare as Criollo chocolate but only accounts for approximately 10% of the market.
The Anatomy Of Cacao Beans
Each kind of cacao bean has a slightly different anatomy, but they have some things in common.
The Theobroma cacao tree produces large fruit with an oval shape. The color ranges from red to yellow and purple. The Trinitato fruit is typically orange, the Criollo fruit is red or pink, and Forastero is yellow.
Inside the fruit, you will find the beans running along the pods. At this stage, the beans are coated with white pulp.
Once the pulp has been stripped away, the brown color of the seeds becomes apparent. The seeds are flat, shaped like almonds, and around an inch, or 2.5cm, long.
Cacao Beans Flavor Profile
Each type of cacao bean has a different flavor profile. Like coffee, the tasting notes can be altered depending on the climate, soil, and other factors.
Criollo is not used in commercial chocolate making as much as Forastero and lacks that classic “chocolate” taste. These beans are mild but smell heavenly. Their more complex flavor is highly rated among coffee connoisseurs.
Forastero has the decadent chocolate taste we’re all familiar with. These cacao beans are rarely bitter or acidic but lack aroma and complexity compared to Criollo.
As a hybrid, Trinitario offers elements of Criollo and Firastero. It has a delicate but sweet taste.
Cacao Vs. Coffee
Pretty much all kinds of cacao have caffeine, which doesn’t necessarily impact the taste but can influence how you feel after eating or drinking chocolate if you’re sensitive to caffeine.
A cup of cocoa will contain 24 mg of caffeine, compared to 95 mg in an average cup of coffee. Although decaf coffee is commonplace, the same can’t be said for chocolate.
Before becoming chocolate, cacao has a naturally bitter and aromatic quality. It resembles a mild coffee that leans into its earthy notes.
Preparing The Cacao Beans For Roasting
Sorting And Cleaning The Beans

If you’re roasting cacao beans at home, you’re unlikely to have the same equipment as commercial chocolate producers. Unless you harvested the cacao beans yourself, then they’ll already be dried and fermented. It is not the beans themselves that are fermented but the pulp on the outside.
Start by sifting through your beans to remove any that are shriveled or discolored. You should also ensure no debris or dust is mixed in with the beans.
Then sort them into sizes. It’s best to roast similar-sized beans in the same batches. If you’re roasting smaller beans with larger ones, they will roast at different times and leave the final product with inconsistent tasting notes.
How To Roast Cacao Beans
There are several ways to roast cacao beans, but if you’re doing it at home, you’ll likely be using an oven or roaster. While you’re cleaning your cacao beans, preheat your oven until it reaches the desired temperature.
The temperature range for roasting cacao beans in the oven or roaster varies. While the higher end of the scale hits 350°F, for your first time, it’s best to play it safe and stick to the 250-275°F range.
Place the cacao beans in the oven at a higher heat, in this instance, 275°F, for five minutes. Then turn the oven down to 250°F. We recommend a maximum of 30 minutes of roasting time and suggest checking at 10 to 20 minutes to prevent overcooking.
Roasting The Cacao Beans
The Roasting Process
The roasting process helps create a recognizable chocolate flavor. Raw cacao tends to be bitter and nutty.
The roasting process works by lowering the amount of volatile acids in the beans, such as acetic acid. Acetic acid is also found in more astringent foods like vinegar, pineapples, and oranges.
Monitoring The Roasting Progress
As mentioned earlier, one of the most common roasting methods entails cooking the cacao beans at a higher temperature for the first five minutes and then lowering it. Check on the beans regularly while roasting to ensure they’re not burning. For your first time, stick to modest temperatures and time frames.
Signs Of Properly Roasted Cacao Beans
Another thing coffee and cacao have in common is the signature cracking sound you will hear during the roasting process. This noise alerts you that the beans are almost finished roasting, but you still need to watch them as it’s easy to miss this sound.
You should also pay attention to the aroma. If they start to smell burnt, you’ve overdone it.
In order to check the beans, pick one and carefully try removing the husk; if you struggle to remove it, the beans are not sufficiently roasted.
Cooling And De-shelling The Cacao Beans
Cooling The Beans
After the beans have been roasted, take them out of the oven and put them on a new tray. Spread the beans out finely to cool. Any further exposure to heat will continue the roasting process.
Allow them to cool for at least an hour or until they reach room temperature. Turn the beans every few minutes to ensure all the surface area has been exposed.
De-shelling The Beans
Once the beans have cooled down, peel the shell off with your fingers. If roasted well, the shell should come off easily. If you’re struggling to get a firm grip, you can use a fork to pierce a hole and peel the shell off.
Ensure the shells are placed in a separate container away from the beans. The shells are removed as they may contain harmful compounds such as heavy metals and mycotoxins. When it comes to commercial chocolate, no more than 5% of the shells are allowed to be in the final product, according to the Codex Alimentarius Commission.
Removing The Nibs
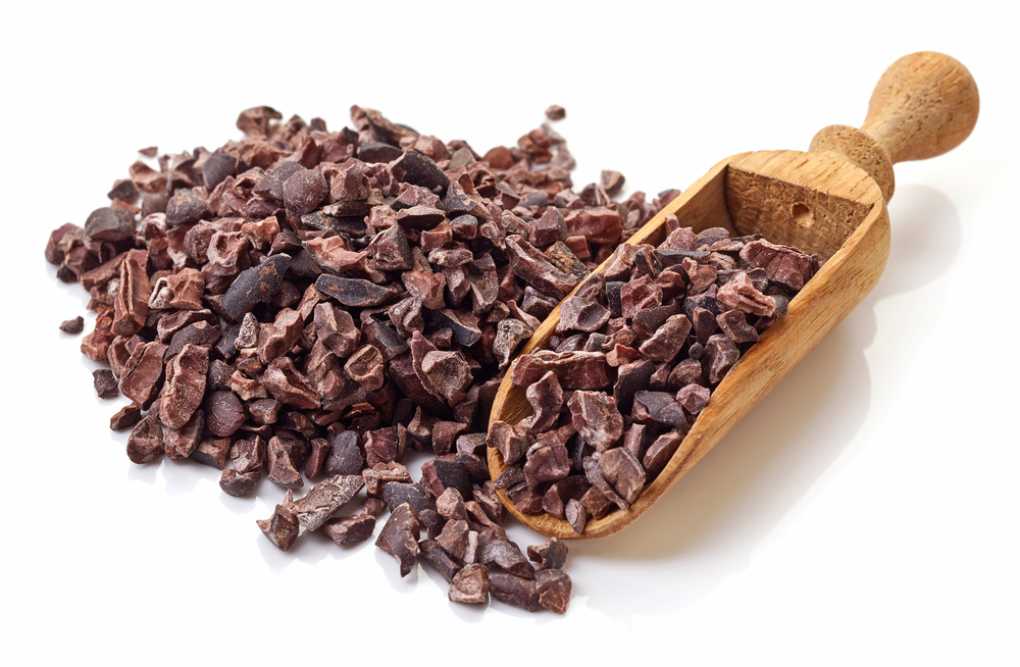
Cacao nibs are simply small pieces of the cacao bean. These are used to make chocolate. To create cacao nibs, you’ll need to break up the beans.
The easiest way to do this at home is to place your beans in a ziplock bag and hit it on a stable surface with a rolling pin. You can also try breaking down small batches of beans in a mortar and pestle.
Grinding And Conching The Cacao Nibs
Grinding The Nibs
To turn the nibs into powder, put them in a food processor. Once you’ve gotten them as small as possible, put them in a coffee grinder and grind them to an espresso-like consistency. Don’t panic if your nibs start to look damp; this is the cocoa butter escaping.
You should weigh your nibs at this stage so you know how much pure chocolate you have. This will help you determine the percentage of cocoa in your chocolate later.
Conching The Chocolate
The process of conching takes place after grinding. It is to ensure the cocoa butter is evenly spread through to chocolate to ensure a smooth, consistent taste. The chocolate is continuously mixed and aerated in a chocolate conche machine to achieve this.
It is also heated during this process to between 120 °F and 180 °F, depending on the type of chocolate being made. Sometimes it is heated automatically due to friction generated during the process. The heat helps the more pleasant flavors in chocolate shine as volatile oils are eliminated.
For home chocolatiers, you probably won’t have a conche machine. Instead, you can move the grounds nibs to a melanger, but a heat-resistant blender or food processor will work too.
A melanger is a type of stone grinder for small chocolate makers. It contains granite stones that churn the chocolate to break down the nibs.
Melangers usually generate enough heat due to friction. Some people will blow warm air from a hair dryer into their food processor or blender, but this may get messy with the lid open. Plus, the devices may naturally generate heat, but some people will quickly heat their cocoa nibs before adding them.
The Final Product
Once your chocolate is smooth, you can add additional ingredients. After conching, you will be left with 100% cocoa which has a bitter taste. You can add sugar and milk to the liquid to make sweet milk chocolate, but taste it at regular intervals to ensure you have the right ratio of ingredients.
For example, if you had 70 grams of conched nibs and added 30 grams of sugar and flavorings, your chocolate would be classed as 70% dark chocolate. Pour your mixture into a mold, and allow it to harden in the fridge.
If you enjoyed this post, you might also be interested in our guide on how to roast coffee beans at home.