Once you start using freshly ground beans, it’s hard to imagine life without your grinder. Here you’ll find 15 ways to maintain your burr grinder.

Sure, pre-ground coffee is convenient and blade coffee grinders are cheap. And if you’re happy with what you’ve got, by all means, brew away! But serious coffee drinkers know that burr grinders are the way to go. They also know how imperative it is to maintain their burr grinder.
Inevitably, coffee bean crumbs and crusty oil residue will be lodged in every nook and cranny of your grinder. Luckily, there are plenty of ways to maintain your burr grinder — from prevention to deep cleaning.
- What Exactly Is A Burr Grinder?
- Oxygen And Heat: Why Regular Maintenance Is Necessary
- Here Are 15 Ways To Maintain Your Burr Coffee Grinder
- 1. Choose an easy-to-clean grinder in the first place
- 2. Grind quality coffee beans
- 3. Avoid using flavored coffee beans
- 4. Grind any excess beans before cleaning
- 5. Try grinder cleaning pellets
- 6. Use rice
- 7. Plunge the burr blades
- 8. Use a lint-free cloth or coffee filter to wipe down
- 9. Wash with mild soap and warm water
- 10. Use a toothbrush
- 11. Have toothpicks on hand
- 12. Use compressed air
- 13. Use a vacuum
- 14. Clean your burr grinder as often as you can
- 15. Replace it
- The Final Word: Maintain Your Burr Grinder
What Exactly Is A Burr Grinder?
To explain what a burr grinder is, it’s important to realize what it is not. It’s not a blade grinder that uses propeller-like blades to chop coffee beans.
Think blender. That’s how blade grinders operate.
On the other hand, burr grinders have, well… burrs, not blades. Think of the burrs as sharp gears that grind by swirling together. It grinds only a few coffee beans at a time and compared to blade grinders, creates a more even and uniform grind.
Baristas and coffee enthusiasts will always prefer a burr grinder because you have more control over the grind than you would with a blade grinder since you can adjust the space between burrs. Long story short, with burr grinders you’ll get a more consistent cup of coffee.
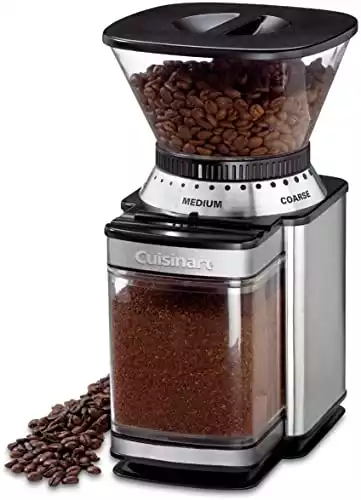
When it comes to burr grinders, there are a ton of options that can often be pricey. You can buy a small, manual one if you haven’t got a lot of space. Or they can be massive, automatic machines like the ones you’d see in your favorite café.
The best burr grinder for you really depends on what kind of coffee you’re making. For long brews, a manual grinder will do. But for espresso-based beverages where you’ll need a finer grind, it’s better to use an automatic burr grinder.
But regardless of which burr grinder you choose, it’ll need a fair bit of maintenance to ensure proper function and great-tasting coffee.
Oxygen And Heat: Why Regular Maintenance Is Necessary
When coffee is exposed to oxygen and heat, it behaves and tastes differently than in its original form. In the process of grinding, small particles of coffee become more susceptible to heat and air, changing their composition.
The exposed coffee grinds become a sticky, smelly, oily mess which is why it’s essential to clean out your burr grinder often. It not only can affect the mechanical function of your grinder, but regular maintenance protects the taste and aroma of your coffee, too.
So, if you prefer delicious-tasting coffee (and I assume that’s agreed upon across the board), knowing how to maintain a burr grinder is critical.
Here Are 15 Ways To Maintain Your Burr Coffee Grinder
1. Choose an easy-to-clean grinder in the first place
So, you’ve come to your senses and realized that a burr coffee grinder is crucial to nurturing your coffee addiction. Thinking long term, the best thing you can do is pick a grinder made with high-quality materials – with the idea that it’ll require less maintenance.
You’ll be hard-pressed to find many burr grinders with burrs made of anything but steel. Steel is probably your best bet since it’s a strong metal, won’t affect the flavor of your favorite brew, and will grind the beans evenly. Plus, steel is easy to clean – and that’s a good thing!
It’s also advantageous to look for a coffee grinder with replaceable burrs. After a while, the grinder is bound to get run down and instead of replacing the entire unit, you can save a ton of money by only replacing the burrs when necessary.
2. Grind quality coffee beans
Now that you’ve chosen a beautiful burr coffee grinder with quality steel burrs, it’s time to protect this prized kitchen appliance. You need to make sure what goes into it is held to just as high of standards.
Over at Whole Latte Love, they mention that “beans are often over-roasted to cover up flavor defects in inferior, low-quality coffees.” How sneaky?! That’s not to say all brands of dark roast beans are low-quality, but it is something to be wary of.

Lighter roasts require a less coarse grind and therefore are a little easier on your grinder. Plus, you’ll tend to get a richer flavor out of a light roast since more of the natural aromas will still be intact.
3. Avoid using flavored coffee beans
Maintaining the proper function of your burr coffee grinder means not only choosing the right beans but avoiding the wrong ones. The two types of beans that could cause problems for your grinder are dark roasted beans (as mentioned above) and more particularly, flavored beans.
You’ll be able to see from the surface of dark roasted and flavored beans that they look extra glossy. Due to excess oils in these beans, you’ll get more gummy remnants which could lead to a whole lot of issues for your burr grinder down the road.
If you like the taste of a dark roast, there are certainly some brands that do it right. And if you like flavored coffee, add it after your cup is brewed. No need for a sticky (and possibly malfunctioning) machine when you could just use different coffee beans.
4. Grind any excess beans before cleaning
You’re loving your new burr grinder, still wondering how you ever started your mornings any other way. You’ve taken all the preventative measures you could and now it’s time to give it a good clean. But where to start?
First, close off the grinder from the bean chute (sometimes called a hopper) and give it whirl without any beans coming through. This way, you’ll be able to remove as many excess grinds from the chamber as possible before the actual cleaning begins.
This uses the centrifugal force (science lesson!) to expel most of those leftover coffee grinds. It’s like that carnival ride that spins so fast that you stick to the wall. The carnival ride is the burrs and the coffee is you.
5. Try grinder cleaning pellets
If you’ve done any kind of research before buying your burr grinder, you’ve probably seen options for grinder cleaning pellets like this on Amazon.com. Or perhaps, your grinder was an impulse buy and you didn’t do any research at all. No judgment!
These cleaning pellets give you an option that doesn’t require taking apart the machine. Simply add the pellets to the hopper (where the coffee beans would normally be) and run them through the burrs.
The cleaning agents in these pellets are chopped up through the grinder and act as a kind of “self-cleaner”. You shouldn’t use them every day but it’s an option for when you just can’t be bothered to disassemble your grinder and really get in there. Again, no judgment!
6. Use rice
Say you’re all out of cleaning pellets and your trusty burr coffee grinder needs a little TLC. Chances are you’ve got a bit of rice in the pantry. You can run uncooked rice through the burrs for a quick maintenance session when you’re in a pinch.
As the rice is ground, it also removes all the grime and oil that was stuck between the burrs. The rice pushes away all the residue lodged in places you wouldn’t be able to reach without having to take the grinder apart.
Grains of rice are tougher than coffee beans and could put strains on the motor. Plus, the starchiness could leave residues of its own. Also, using rice could void your warranty, so double-check.
Usually, it’s better to just take the grinder apart when you’re ready for a deep clean.
From here, you’ll see how to maintain your burr grinder by taking it apart. If you are using an electronic burr grinder, be sure unplug the machine before you start disassembling anything to avoid any potential mishaps. No missing fingers, please!
7. Plunge the burr blades
Yep, you heard me. You’re going to use a plunger to clean your burr coffee grinder – a classic, ribbed toilet plunger. But please, for crying out loud, do not use the same one that lives in your bathroom!
According to the Australian Barista Academy, if you have a manual dosing grinder, you’ll want to set the plunger over the burr blades and seal the collar. And then just have at it! But make sure you plunge in a large basin to catch the coffee that’s sure to be making a mess.
Plunging the burr blades essentially cleans deep inside the crevices. It’s a bit of manual effort and you’ll need to do a few rounds of plunging before the blades are totally clean, but it’s a surefire way (that you probably haven’t thought of) to maintain your burr grinder.
8. Use a lint-free cloth or coffee filter to wipe down
When maintaining your prized burr coffee grinder, there’s a lot of focus on the burrs. But it’s important to keep the hopper (the part that holds those beautiful coffee beans, remember?) nice and clean as well.
Once everything’s separated you’ll want to wipe down both the hopper and the grinding chamber with a lint-free cloth or even a coffee filter – anything that won’t leave bits and pieces behind.
The last thing you want are shards of cloth or traces of paper towel in your burr grinder. Pretty pointless if your trading gummy coffee grinds with traces of paper. Yuck!
9. Wash with mild soap and warm water
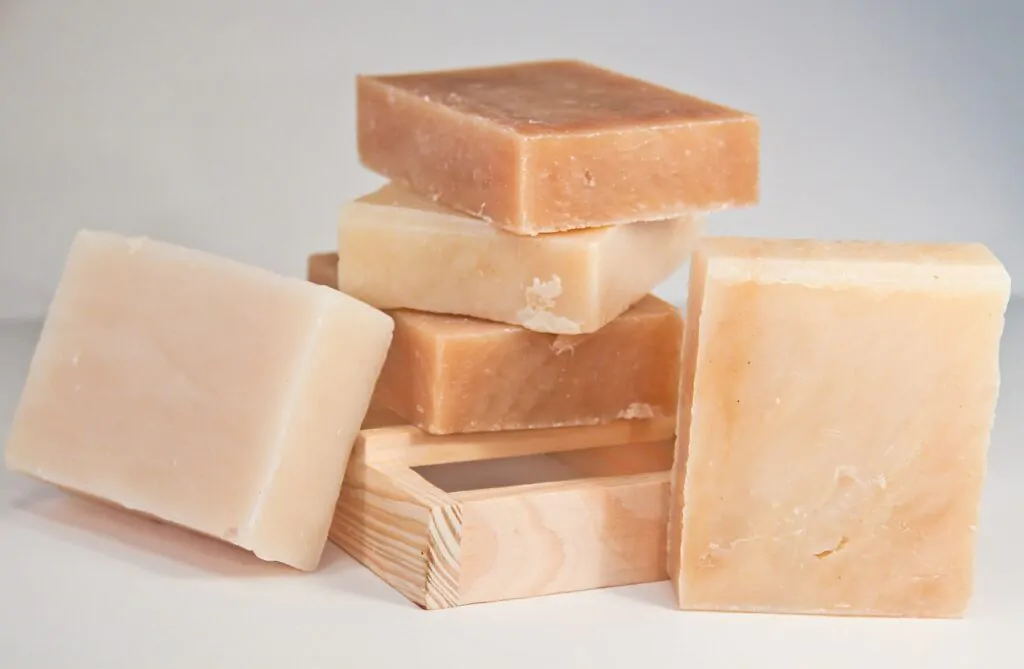
If you feel like a wipe down didn’t quite do the trick, you can clean the burrs and hopper with warm water and a bar of mild soap. It should go without saying, but be sure not to use water on any of the electrical parts – only wash the separated components.
In order to clean even the tiniest openings in the burrs and the most caked-on bits in the hopper, submerge the detached parts in sudsy, lukewarm water to release the coffee pieces that couldn’t be reached using a cloth.

But make sure you rinse everything completely and don’t use soap with any crazy fragrances. Soapy residue in any part of your burr grinder will surely affect the taste of your coffee and you probably don’t want your morning cup to taste anything like lemon ginger. But who knows!
10. Use a toothbrush
What do you know… another bathroom staple used to clean a burr grinder – but don’t use the same one that goes in your mouth! You can use a toothbrush (or really any kind of soft brush) to scrub clean your burr coffee grinder.
When coffee grinds are wedged in the burrs, the bristles of the toothbrush can help wriggle free any debris that’s causing trouble. Just like how brushing your teeth gets all the gunk out from those hard-to-reach places between your jaws. What a concept!
Other kinds of brushes work too and they even sell brushes made specifically for espresso machine cleaning. But why not use something you might already have lying around the house, right?
11. Have toothpicks on hand
Wait, another tooth-related item? I know, I know. But really, you can use a toothpick to poke out anything lodged in the burrs.
Avoid using super breakable toothpicks though. It’ll defeat the whole purpose if, in an attempt to remove stubborn coffee grinds from the burrs, a chipped piece of toothpick gets stuck there instead. It would definitely be a rude awakening to start your day with a mouth splinter. Ouch!
12. Use compressed air
Do you know those cans of compressed air that you use to clean your laptop keyboard? Makes sense to use that same logic to clean your burr grinder, doesn’t it? I think so.
After a bit of brushing with the toothbrush or poking with a toothpick to loosen any stuck-on coffee grime, blast it with air so all of it is well and truly out of there. As you can probably imagine, this method could get a bit messy and is probably better for small burr grinders – one that can fit in your sink and catch all the flying coffee.
13. Use a vacuum
The power of air works both ways. Instead of blowing residue away, suck it up with a vacuum. Especially if you use an automatic dosing grinder, grab your vacuum to pull away anything caught in the burrs.
Utilize a vacuum that has a wand head or nozzle attachment and re-attach the hopper to its base. Hold the vacuum head where the coffee grounds drop out and turn on the grinder. Activate the vacuum and keep it going until the burrs are clear.
Side note: To do this properly, you’ll probably need a commercial vacuum – household vacuums might not be up for the challenge.
14. Clean your burr grinder as often as you can
A general rule of thumb:
- Dust away excess coffee from your grinder daily
- Wipe down or brush out the hopper and grinding chamber every week or two
- Commit to deep cleaning your burr grinder every three to six months
Of course, there’s no foolproof schedule that works across the board. It depends on how much the grinder is used and with what kinds of beans determines an appropriate cleaning schedule.
The idea is that the best defense is a good offense, so if you want to properly maintain your burr grinder, the best thing you can do is to clean it consistently. Then, there will be less to deal with when it comes time for a major coffee grime overhaul.
15. Replace it
Sometimes, things just get to a point of no return. As much as you vacuum, toothbrush, plunge, wipe and soak your burr grinder, the coffee and oil buildup might just be too much after months and months of hard work.
When you’ve done all you can do to maintain your burr grinder, you have to know when it’s time to throw in the towel and find something new. But it’s all good because this way, you can learn from any mistakes you might’ve made the first go around.
Maybe this time you’ll get a grinder with replaceable burrs. Maybe you’ll use more light or medium roast coffee beans. Maybe you’ll do some deep cleaning every three months instead of every six.
Burr grinders that need no maintenance don’t exist. But once you see the results of steady upkeep and how much better your coffee tastes, you’ll understand its importance.
The Final Word: Maintain Your Burr Grinder
So, there you go. There are plenty of ways to maintain and clean your burr grinder. All you have to do is find what works for you. Now you’re ready for the most rewarding coffee grinding experience you’ve ever had.
Well… maybe not. But at least now you’re fully capable of effectively cleaning your burr grinder. And that’s a start. All that’s left to do is brew!
Have you found even better ways to maintain your burr coffee grinder? Do you have a favorite light roast brand? Were there any suggested cleaning methods that went terribly wrong?
Let us know in the comments.
See Also:
DO COFFEE GRINDER BLADES GET DULL?
HOW MUCH DOES A GOOD COFFEE GRINDER COST?
HOW LONG DOES A BURR COFFEE GRINDER LAST?

