Are you wondering how to use a milk frother? I’ll show you how to master excellent frothy milk for any drink using the four most popular devices.
There is more than one device when it comes to milk frothing. While the most popular tool is a handheld frother with a disc whisker at the tip, frothing milk is more fun and less hassle if you upgrade to an electric milk frother or a steam wand. On the manual side, a French press also comes in handy, but you need more arm work to get it done.
In this article, I’ll show you how to use four types of milk frothers to pull off perfect barista-style coffee drinks. The next time you crave that creamy hot chocolate, latte, or mocha from Starbucks, you can make it yourself.
5 Tips For Perfect Frothed Milk
Choose The Best Type Of Milk For Frothing
Whole milk and 2%-fat milk give you the desired thickness and creamier foam. Non-dairy milk such as soy milk, almond milk, and oat milk are better for micro-foam.
If you want your latte or cappuccino to be more delicate on the mouth, opt for skim milk, as it has plenty of air bubbles. Check out our round-up of espresso with milk drinks to show off your skills.
Heat Milk Before Putting It In A Frother
You need to heat the milk before frothing it if you’re making a hot drink. However, you don’t need to do that for cold drinks. The best temperature to steam your milk before frothing is somewhere between 140℉ and 155℉ for instant drinks and 165℉ for takeaways.

Be careful not to boil your milk; high heat changes the protein content in your milk and ends up taking away the desired texture, especially if you’re working with whole milk. Boiled milk also results in the absence of sweetness. At the end of the day, the micro-foam fails to form despite how long you aerate your milk.
You can heat milk using either a saucepan or a microwave. Add milk to the saucepan and place it over medium heat; keep stirring to prevent it from simmering, and use a thermometer to detect the temperature. Heat milk for 30 seconds in a microwave.
Make Your Milk Smooth
The secret behind milk frothing is to turn the liquid milk into a desired texture when making a certain drink. Lattes, flat white, cappuccinos, and macchiatos are some of the most popular beverages that require a creamy, airy mouthfeel of dense, frothy milk.
Perfect latte art cannot go without silky smooth milk. You want to suck all the air bubbles out of your milk and leave behind a velvety texture.
If you use an espresso maker’s steam wand, try to get the wand in the middle of your milk jug. Then, tip the jug at the right angle until the wand is leaning into the jug’s side. The secret behind this is to create a big whirlpool to suck all the large bubbles out.
Get The Right Amount Of Air
If the milk is not foamy or too heavy, making latte art will be a daunting task. The best texture of frothed milk boils down to the amount of air in the milk when you aerate it.
You want to look for about 0.2 inches of micro-foam when making latte art. A texture like this comes with the right weight that lets you make everything from the classic heart shape to flowers and animals. Meanwhile, a cappuccino needs more foam, around 0.4 inches.
No Fancy Frother? No Bother
If you happen to lose your favorite milk frother, look for an airtight container or mason jar, and you’re good to go. The container must be microwave-safe.
All you need to do is pour the milk into the jar and shake it vigorously until it’s foamy. Take off the lid and pop the jar in the microwave for 30 seconds. Take it out, and you’re guaranteed an almost perfect layer of warm foam without any hassle.
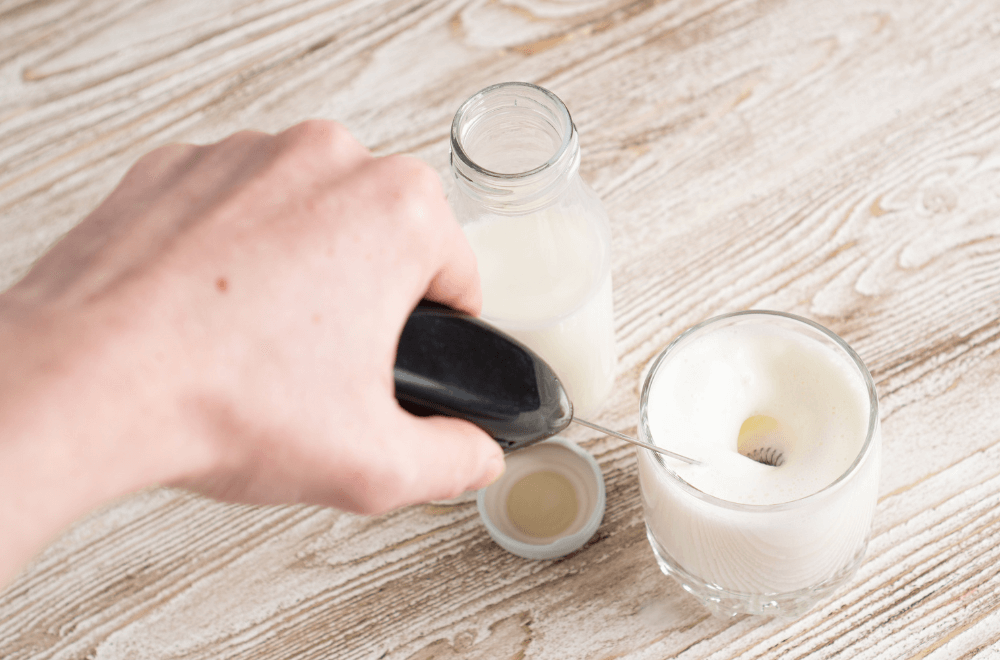
How To Froth Milk With A Handheld Frother
Handheld milk frothers usually come with battery-powered whisks. Most of them run at one speed only after you press the start button on the side of the handle. A hand frother is famous for its ease of use; all you need to do is submerge the whisk in the milk and turn it on.
Simple as it may seem, you may end up doing it wrong if the whisk doesn’t reach the right level of depth in the milk, especially if you’re trying to accomplish a smooth micro-foam for latte art.
Materials Needed
- A handheld frother
- A milk jug
- A saucepan
- A spatula
- A thermometer
Method:
Step 1: Heat The Milk
Add your milk into the saucepan and place it over medium heat. Keep stirring the milk to prevent it from boiling.
Turn it off when the milk reaches 155℉. Pour the milk into the jug.
Step 2: Froth Milk
Submerge the tip of the handheld frother deep into the warm milk before you turn it on to make sure the liquid won’t splash all over the place.
Press the start button and slowly move the frother around until it reaches the desired foamy consistency. Keep the frother at a 45-degree angle. Press the button again to stop frothing.
How To Froth Milk With A Manual Milk Frother
Speaking of manual milk frothers, a French press is the most common plunger-based device. The flip side is that it requires lots of arm work and effort as there is no battery or electricity assisting you along the way.
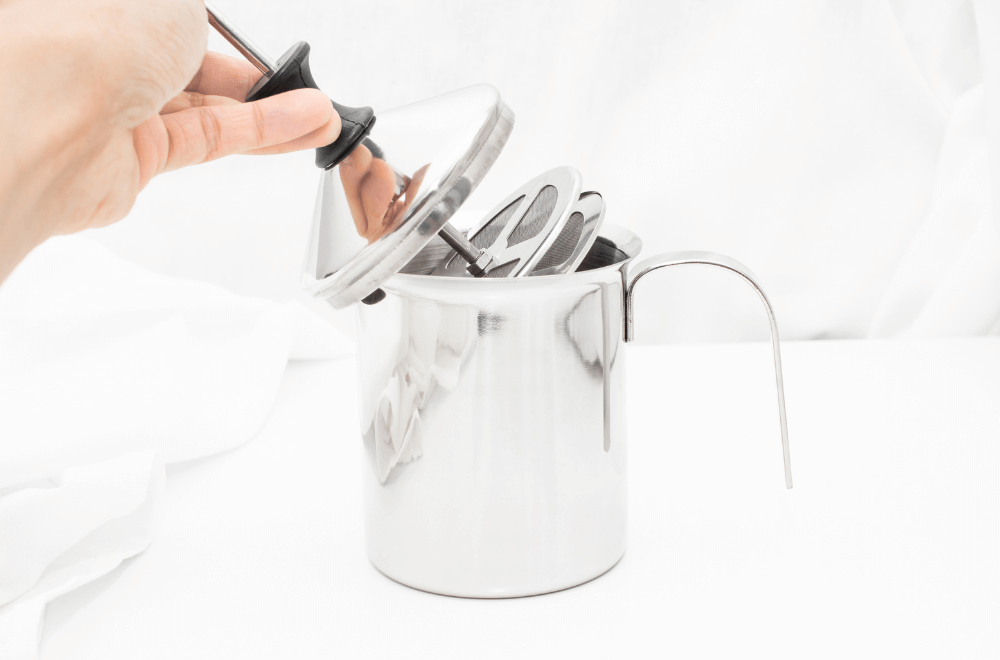
While you can use any French press for milk frothing, opt for an insulated model, which is designed to keep the milk at a higher temperature. The downside to this type of French press is that you cannot see the texture of your milk inside.
Materials Needed
- A French press
- A saucepan
- A spatula
- A thermometer
- A container
Method:
Step 1: Heat The Milk
Add your milk into the saucepan and place it over medium heat. Keep stirring the milk to prevent it from boiling. Turn it off when the milk reaches 155℉.
Step 2: Froth Milk
Pour heated milk into the French press. Cover the French press with the lid and move the plunger up and down.
Use the other hand to hold down the lid to keep the milk from splashing out. Stop when the milk doubles in size and creates a beautiful foam. Pour the frothed milk into the container for later use.
How To Froth Milk With An Espresso Machine’s Steam Wand
Most espresso machines in coffee shops come with a steam wand on the side. The wand acts as an attached arm that can be adjusted to the desired angle. By using an integrated steam wand of a coffee machine like this, it lets you make espresso drinks and frothy beverages a lot faster.
Materials Needed
- An espresso machine with a built-in steam wand
- A milk jug
Method:
Step 1: Turn On The Steam Mode
A steam mode can be found on most semi-automatic espresso machines. Switch the outlet source to the steam wand and turn it on.
Step 2: Start Frothing Milk
Add cold milk to the jug and make sure the steam wand is fully dry. Adjust the position of the wand and submerge the tip of the wand into the milk to start.
To slowly heat it, move the tip of the wand further down near the bottom of the jug until it creates a whirlpool. Stop once it reaches the right amount of milk foam. Remove the steam wand from the jug and turn it off.
How To Froth Milk With A Nespresso Milk Frother
Nespresso has brought to life plenty of handy inventions that go beyond just capsule coffee. If you’re looking for an automatic milk frother that can steam milk and froth at once, opt for this Nespresso Milk Frother. Here’s how you use it.
Materials Needed
- A Nespresso Aeroccino Milk Frother
- A milk jug/pitcher
- A damp cloth to clean
Method:
Step 1: Add The Milk Into The Jug
Make sure the jug is dry, and replace the seal on the lid. Attach one whisk to the inner base of the jug, and the other whisk goes into the storage area hidden under the small black dome at the base.
Place the jar on top of the machine’s base and let it sit in place. Pour your milk to the right level. The bottom line indicates the right level for a small drink, while the upper line is for a bigger drink.
Step 2: Start Frothing
Press the start button on the side of the jug once to make cold foam. Press it twice for hot drinks. The button flashes a green light for cold milk froth and red for hot milk froth.
Step 3: Prepare To Serve And Clean
Pour the frothy milk into your beverage and remove the jug from the base. Take off the lid, whisk, and seal.
Use a damp cloth to wipe off the excess liquid with soapy water – this Nespresso milk frother is not dishwasher safe. Set aside to dry. Check out our list of the best automatic milk frothers.
FAQ About Milk Frothers
What Are The Best Milk Frothers On Amazon For Beginners?
Opt for this PowerLix Milk Frother Handheld Battery Operated Electric Whisk Beater if you need a small and portable handheld milk frother.
For an upgrade, this automatic Nespresso Aeroccino3 Milk Frother creates smooth milk with a built-in heating function. It’s also very easy to use and affordable for beginners.