Read this article so you can learn how to brew Lifeboost coffee for the best notes, flavor profile, and strength.
Brew shmoo, you take the coffee, place it in the coffee machine and eyeball it until it’s good, right? Wrong! So wrong! I had to learn a hard lesson about wasting beautiful coffee grounds before I finally understood how vital it was to properly measure and brew your coffee using the right tools.
As our Lifeboost Coffee review explains, it’s is a special type of coffee that features high-quality, organic beans and is grown in the most optimal conditions. It’s a single-serve coffee that is low acidic, easy on the stomach, and single-origin. That’s why it’s important to make sure you get the best flavor out of your grind by taking the time to measure correctly and use brewing methods designed to bring out Lifeboost Coffee’s beautiful flavors. Below is everything you need to know about how to brew Lifeboost Coffee for the best cup of your life!
Materials Needed
Before we tell you about the materials you’ll need, it’s important to note that, depending on the brewing method you choose, you’ll need different types of brewing tools. For the most part, drip brewing coffee is going to be the easiest and most accessible for people with a regular coffee machine in their kitchen. Lifeboost Coffee can definitely be brewed successfully with a regular old drip machine.
However, for iced coffee lovers, we recommend opting for a cold brew (not iced coffee) method for brewing. That’s because cold brew produces a naturally low acidic taste, and is a perfect complement to the low acidic taste of Lifeboost Coffee. In addition, darker roasts will need to be brewed using a pour-over method for the best effect. While you can brew dark roast using the same method as brewing medium roast coffees, expect a bit more bitter aftertaste.
That being said, you’ll need materials for both brewing methods, including:
- Coffee grinder
- Standard drip coffee machine (the cups don’t really matter since we’re going to be using grams)
- A small kitchen scale
- A standard cup measurement
- Filtered water (cold)
- Kettle to boil water (preferably a kettle with a temperature setting)
- Pour-over machine
- Coffee filters
- Mason jar (24 to 32 oz)
- Cold brew bags (mesh bags with drawstrings)
Step 1: Decide Which Brewing Method You Want To Use
The most important part of brewing Lifeboost Coffee correctly is to decide which method you want to use and make sure you get the right materials. For standard drip coffee, consider using a medium roast coffee. Lifeboost’s best-seller is their medium roast Nicaraguan coffee, which is rigorously tested to ensure its quality and toxin-free composition. Medium roasts usually hold up better to a regular drip machine than lighter roasts. That’s because they have a nuttier finish and a fuller body, making it a better all-around coffee for brewing in a drip machine.
For cold brew, Lifeboost offers their Optimist light roast coffee which is slightly more acidic, yet fruity and a good option for cold brew coffees. Light roasts won’t necessarily hold up well to drip methods, and it’s a shame to waste their beautiful flavor profiles on anything but cold brew. However, the choice is yours since you can use all roasts for cold brew!
Finally, the dark roast is the most complex of all roasts to brew. That’s because dark roasts are roasted for a longer period of time, burning away a lot of the caffeine content and in the process creating a beautifully dark, nutty, and strong coffee with a bitter aftertaste. For dark roasts, it’s recommended to use a pour-over method along with a kettle that can measure temperature.
Step 2: Grind Your Coffee
By far the best way to enjoy your Lifeboost Coffee is to grind it fresh before brewing. If you don’t have a grinder at home, you can buy pre-ground coffee, but fresh-ground coffee is always better. We recommend using a medium to coarse grind for standard drip machines, and a coarse grind for cold brew and pour-over dark roasts. Medium grinds are fine for standard drip machines since the machine will extract the coffee through the filtering process.
However, for pour-overs, a coarser grind is needed to reduce the extraction. Think about it this way: the coarser the grind, the less you’ll extract. This is needed for dark roasts to reduce the bitterness profile, although you’ll be able to offset this using more water (more on this later). In addition, coarse grinds allow you to make cold brew over a couple of hours without leading to over-extraction and bitterness.
Step 3: Measure Your Coffee
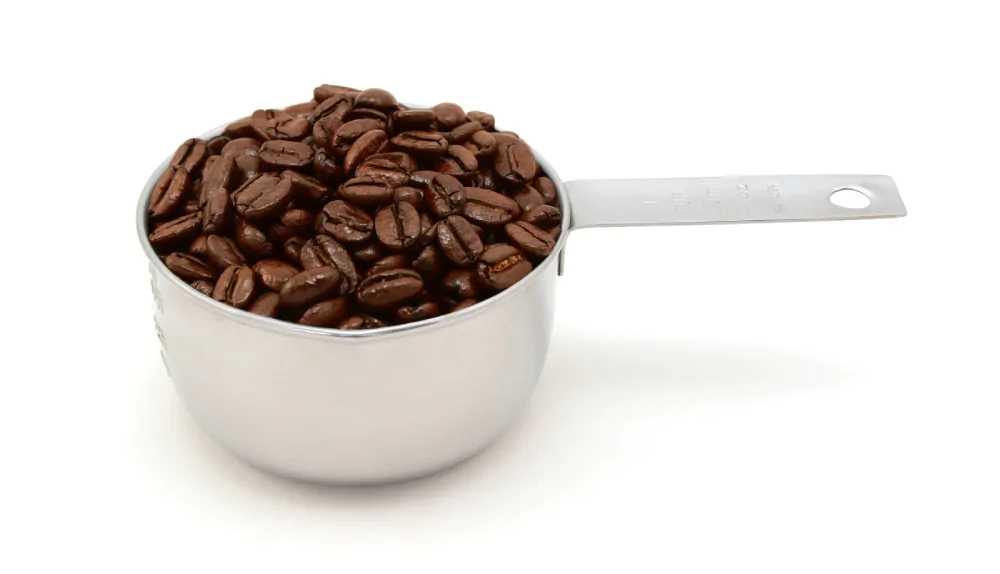
You’ll need to measure out different amounts of coffee depending on which brewing method you choose. For help, watch out for these common coffee brewing mistakes!
For Cold Brew Coffee
For drip brewing, it’s best to use a 1:4 ratio to 1:5 ratio of Lifeboost Coffee in cups. This means that for every 4 to 5 cups of water, use 1 cup of coffee. Use your standard cup measurement for this step, and pour your cups of water into a mason jar or other vessel where you’ll store your coffee. It’s best to use an airtight container for this method, such as a mason jar with a lid.
For Medium Roasts
For medium roasts, Lifeboost says a 1:17 ratio is ideal. This means that for every gram of coffee, you’ll need 17 grams of water. For instance, you’ll need about 20 grams of coffee for every 355 grams of water for a good brew. It’s best to use a small kitchen scale for this measurement. If you want a stronger cup, opt for a 1:15 ratio (but no more than this, or else you’ll have more bitterness and possibly too strong of a cup), or a 1:18 ratio for a lighter brew.
For Dark Roasts
For dark roasts, you’ll need to use a slightly higher ratio of about 70 grams to 1 liter of water, or about a 1:14 ratio. That’s because, as mentioned earlier, you’ll be using a coarser grind that lowers the extracted amount of coffee during the pour-over method. Using more water will help you get a better pull and allow you to have a good balance despite the lower extraction.
Step 4: Brew Your Coffee
Once you’ve measured out your coffee, it’s time to brew! The hard part is admittedly done (hooray)! Use these brewing methods below!
For Cold Brew:
- Place your measured coffee into a mesh coffee filter bag with drawstrings. You can find them on Amazon or online.
- Place the coffee bags into the jar of water, and cover the jar allowing the lid to rest over the strings. This ensures the coffee bag stays in place and doesn’t sink to the bottom.
- Leave the coffee in the fridge for the next 18 to 24 hours.
- Don’t wait for more than this timeframe, or it will lead to a bitter-tasting cold brew. Take the filtered bag out and enjoy!
For Drip Brewer:
- Place your coffee grounds pre-measured into the filter of the drip machine.
- Pour filtered water slowly into the machine. The temperature doesn’t matter, however, DON’T use boiling water. Warm or room-temperature water is fine.
- Turn your coffee machine on and watch the magic happen.
For Pour-Over:
Okay, this takes a bit of skill, so it’s best to use a pour-over kit for this method.
- Place your pre-measured coffee into the filtered area of the pour-over.
- Heat your water up to boiling in your kettle with a thin spout. Around 100 degrees Celsius is ideal.
- Pour the hot water into the coffee until you notice bubbles. A couple of splashes are fine to start the extraction method.
- COOL DOWN your water by inserting cooler water and dropping the temperature down to about 80 degrees Celsius. You always want to use cool water for darker roasts.
- Wait for the extraction to finish (about 45 seconds) and then pour the cooler water over the rest of the coffee. Around 1 liter, or about 4 cups, per 70 grams is ideal.